I admit, I procrastinated my Christmas gifts this year. It’s a good thing though! It lead to the creation of this pattern!
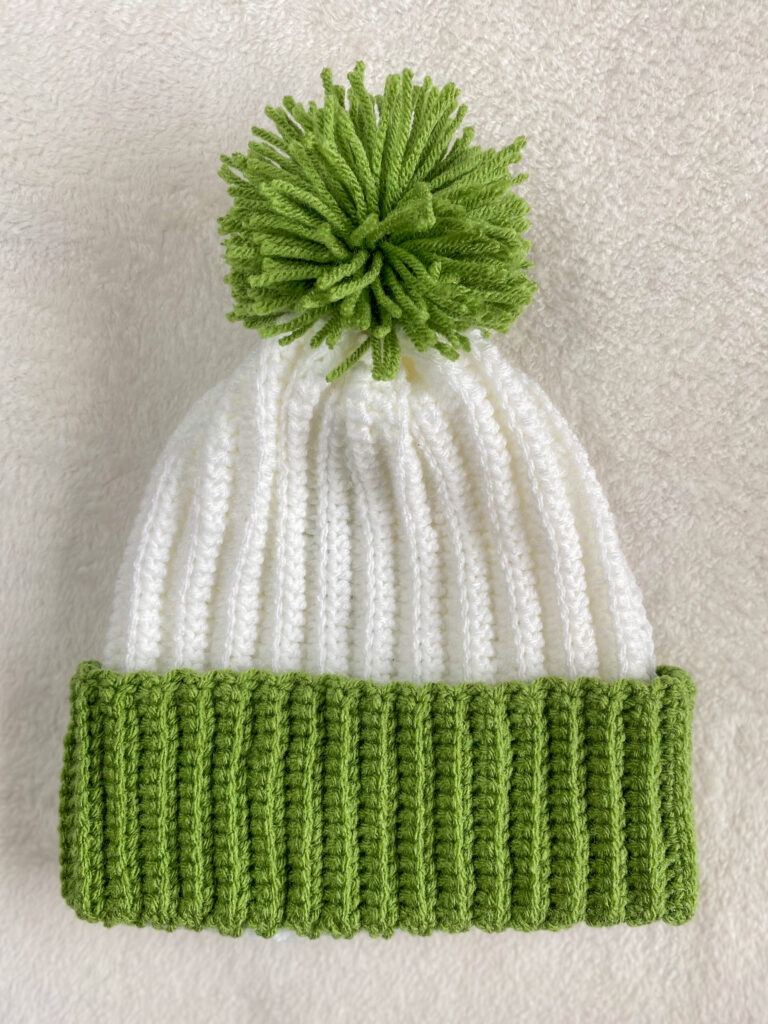
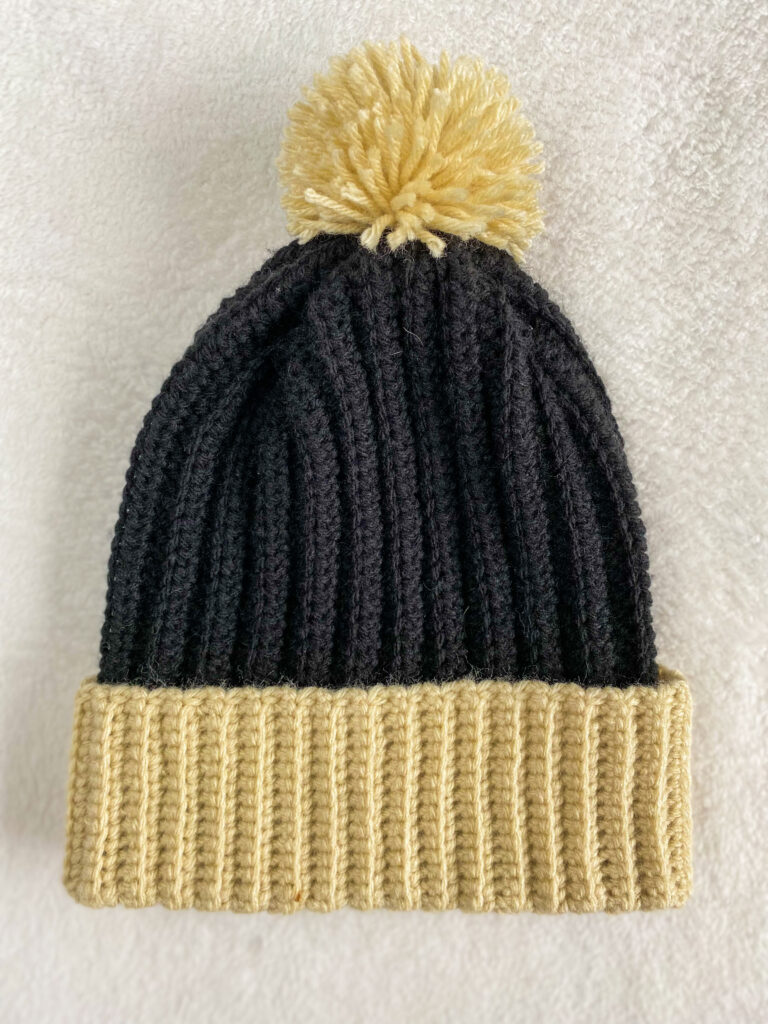
I was making a beanie for Christmas for one of my friends and I though a solid colored beanie was too boring so I decided I wanted to make it more interesting. After a lot of thought and trial and error, I decided I wanted the beanie to fold and that the fold should be a different color. Still, this wasn’t good enough for me. I wanted it to look like a cohesive so I decided to add a colored pom pom on top!
The wonderful thing about this pattern is that you can make it out of any 2 colors you want so it is completely customizable! This beanie is the perfect accessory for cold, winter days and anyone you make this for will love it! I will be making this beanie in as many colors as I can think of so I can wear it with everything in my wardrobe.
If you make your own version of the Two Toned Beanie, please tag me in your posts! I am @crochetwithkathryn on Instagram and TikTok! Happy crocheting fiber artists!
Notes: – Pattern is written in US terms
– Crocheting in the BLO creates an easy ribbed look
Row 1: Skip the first st and place a hdc in the 2nd st from the hook. Continue with hdc across the row (40), ch 1 and turn
Row 2: In the BLO hdc across (40), chain 1 and turn
Repeat row 2 until the number of rows can wrap around your head
*For me, this was 46 rows*
Joining the two ends of the beanie
After you have created the rectangle that will serve as the main portion of the beanie, the shorter ends of the rectangle need to be joined to form a tube
1. Currently on the hook, there is a ch 1 and the work has been turned. Line up both ends of the rectangle together and sc through BOTH ends of the rectangle and continue down the row.
2. Fasten off your piece and leave a long tail to close the beanie with
3. You will be left with a long tube that should fit comfortably on your head
4. The side of the beanie with the sc row is the inside of the beanie, therefore no one will see the join
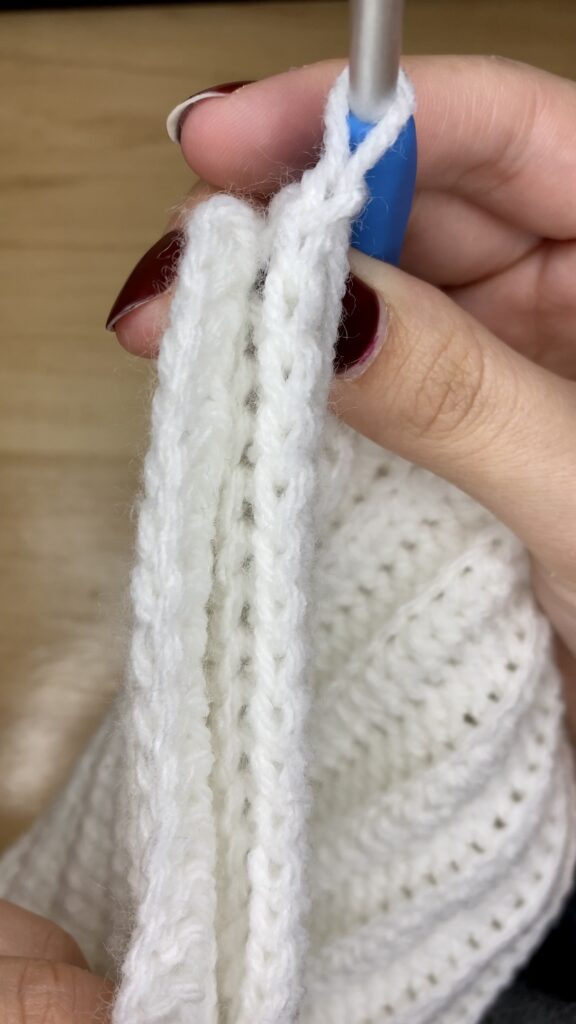
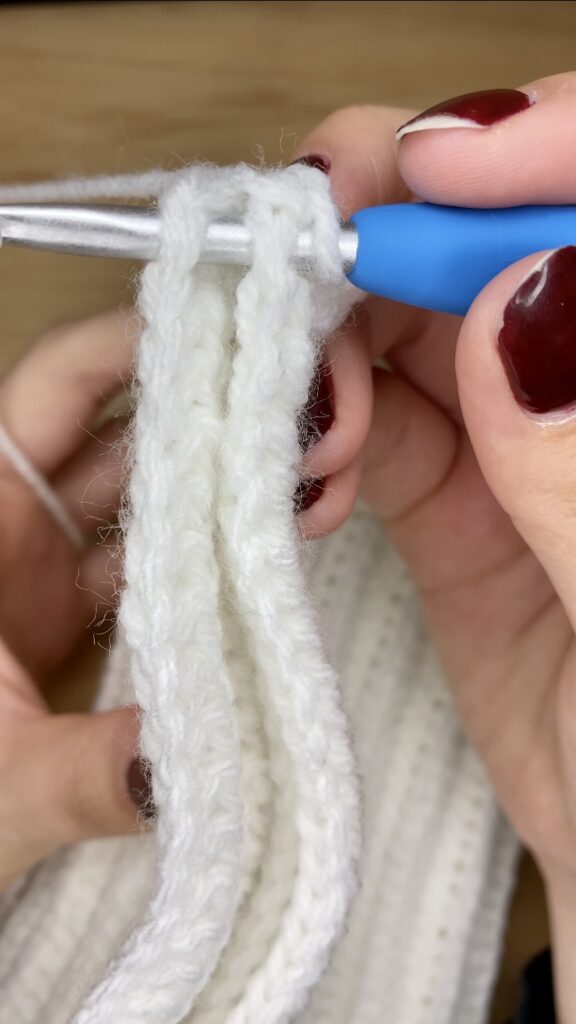
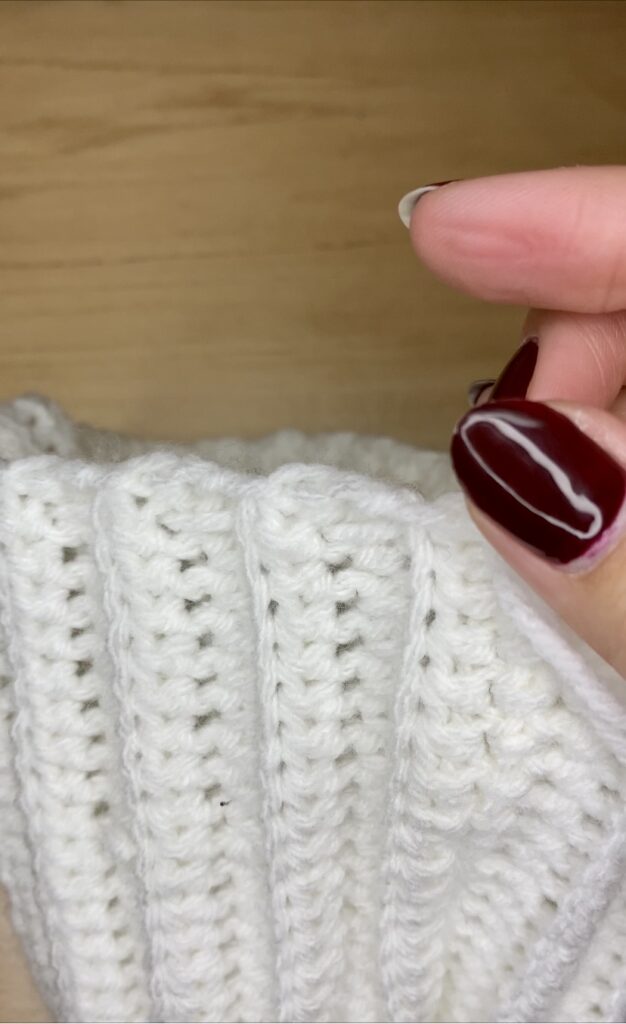
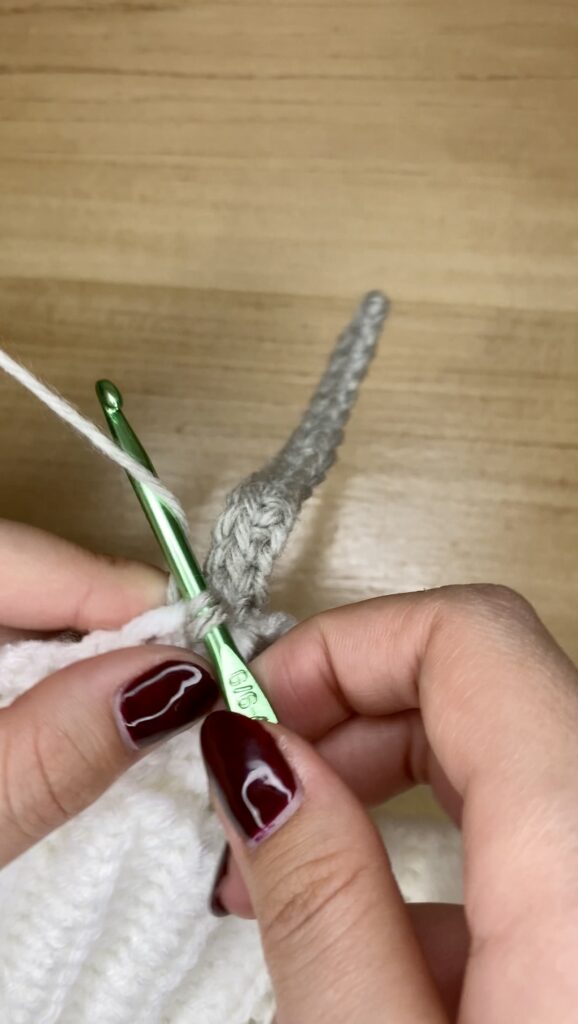
Closing the top of the beanie
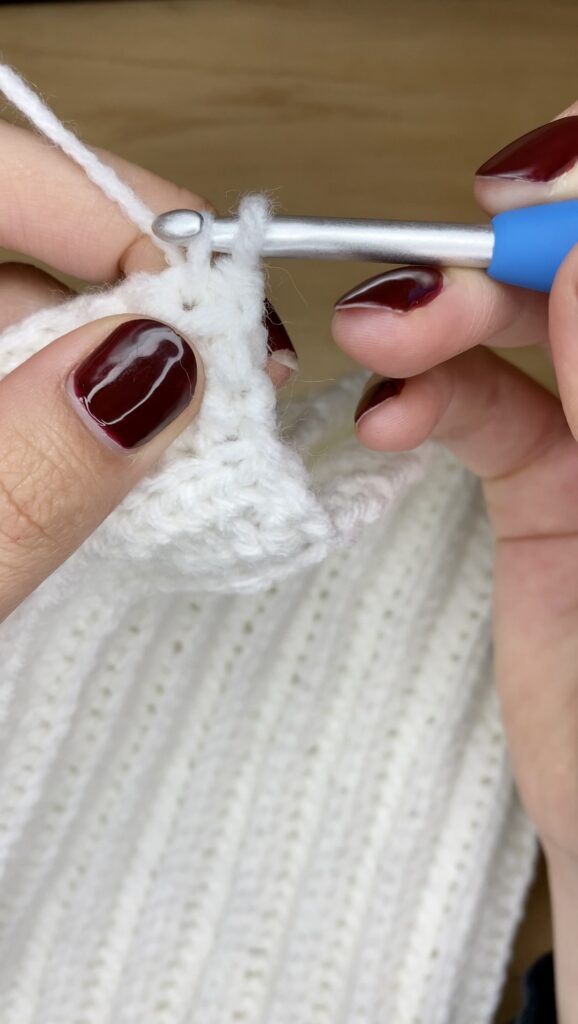
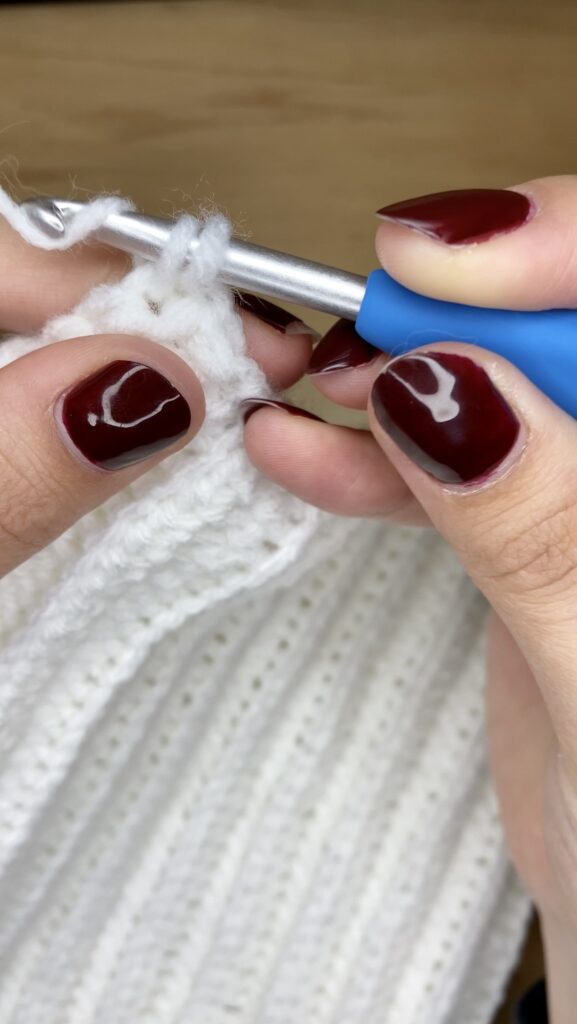
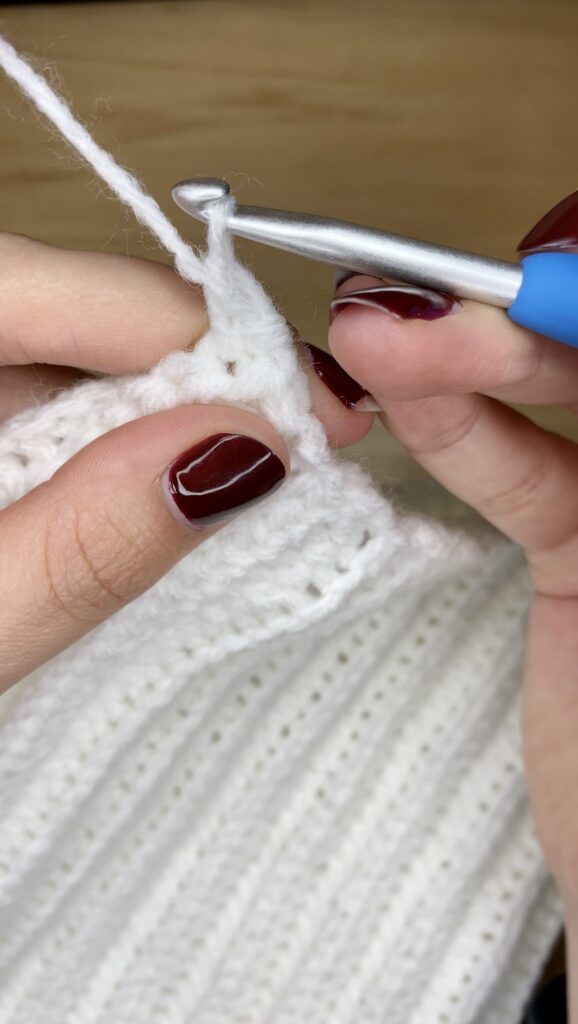
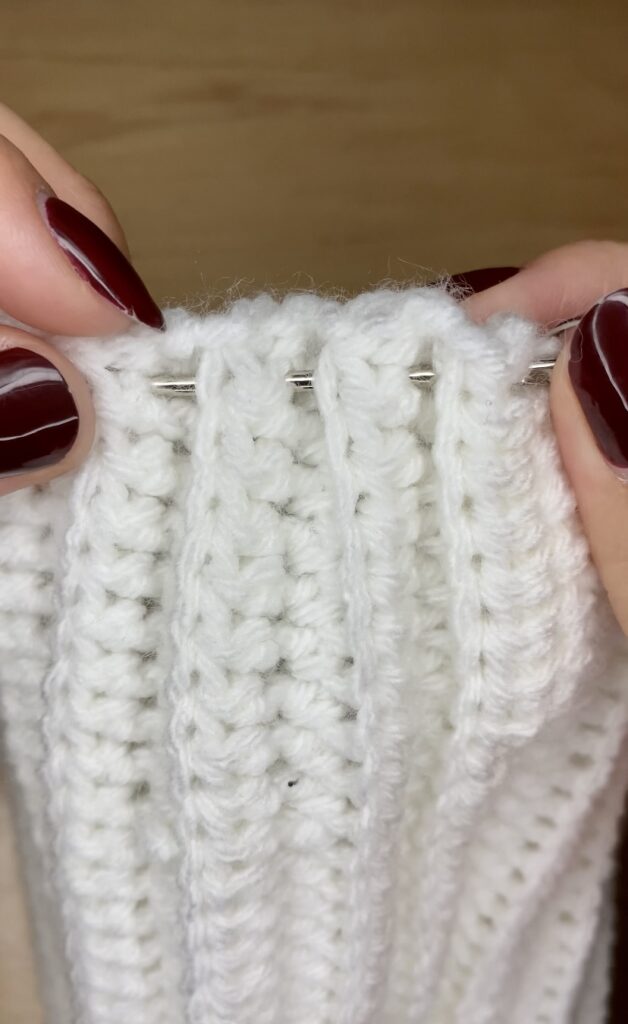
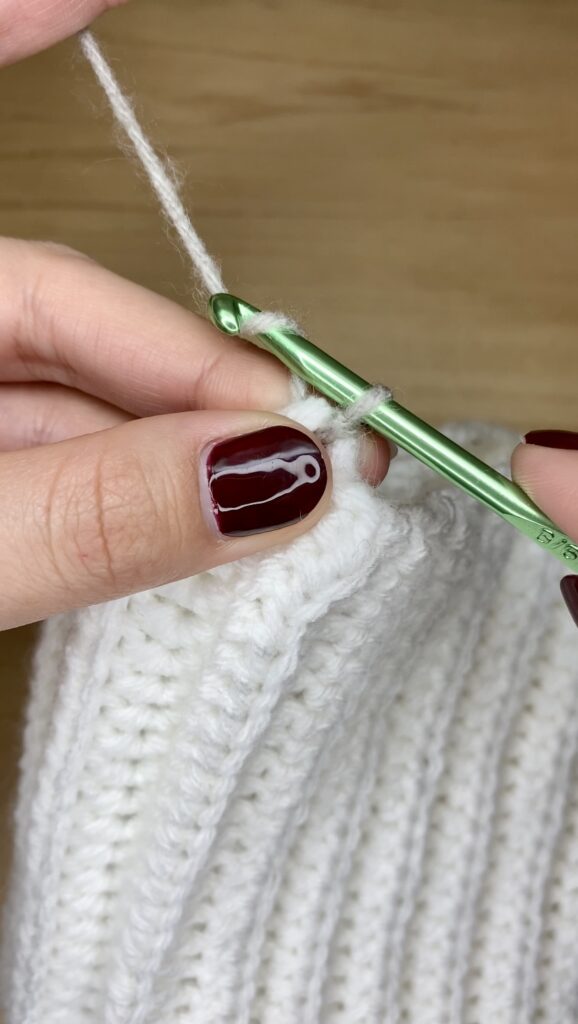
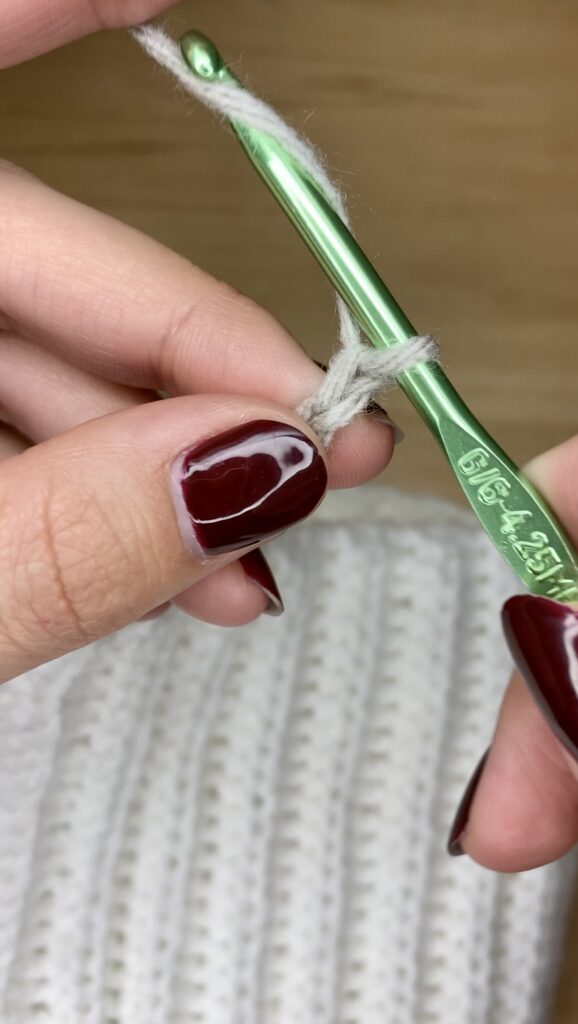
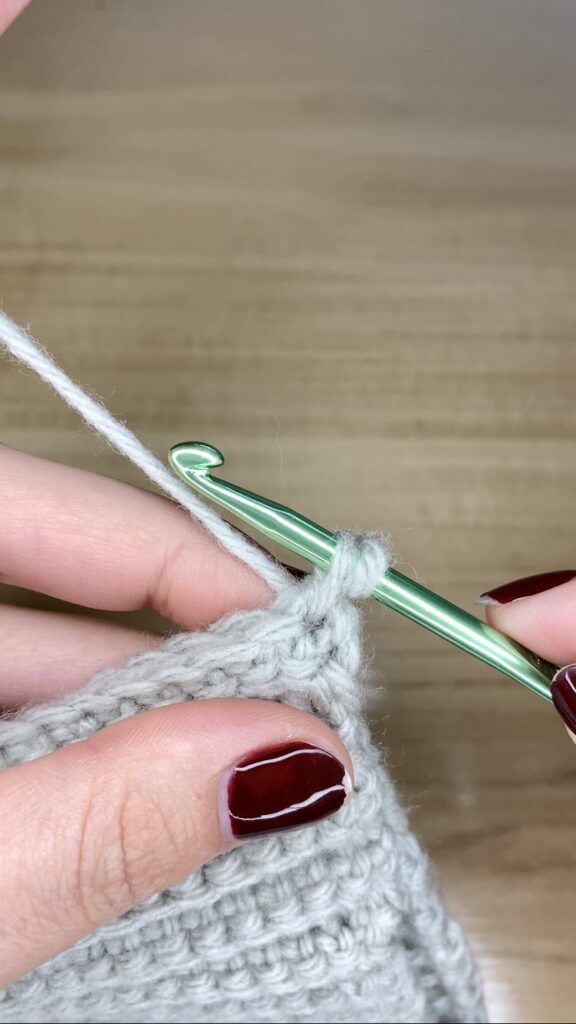
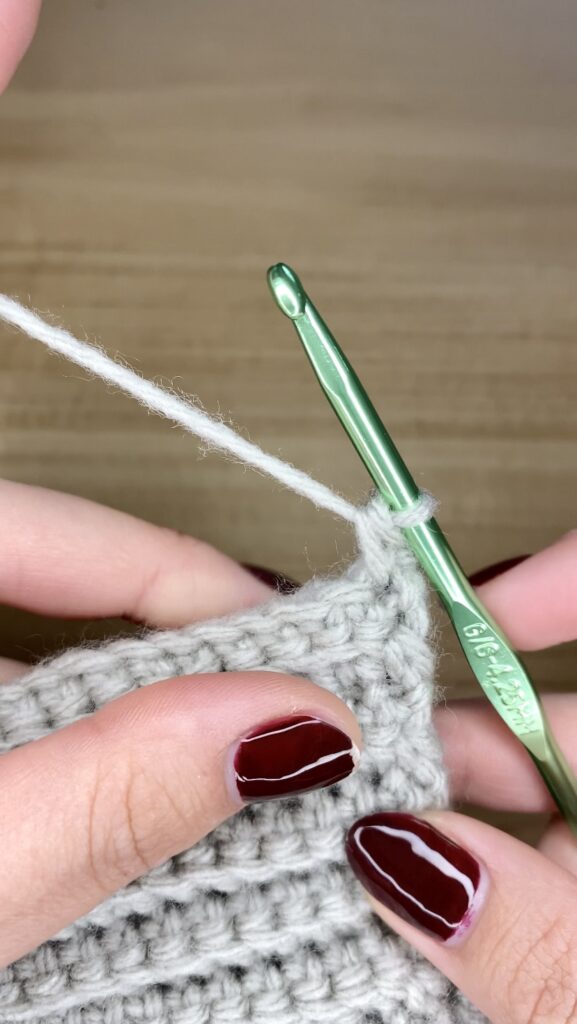
1. Thread the long tail you left from joining the beanie through the tapestry needle
2. Use the ribbing of the beanie as a guide to weave your needle through
3. See the pictures below
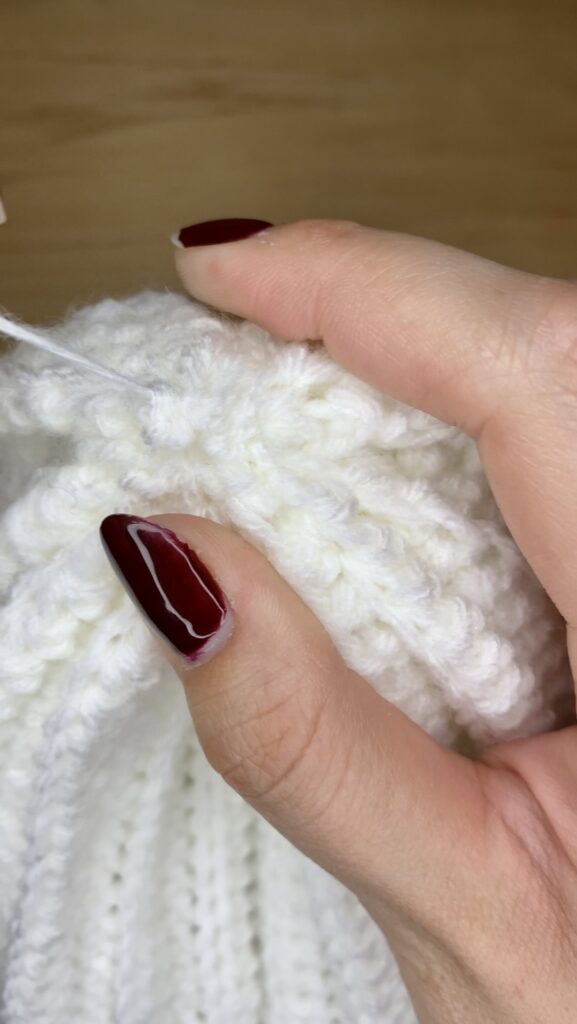
4. Pull the thread while pushing the beanie together until there are no holes
*Note: if there is a larger hole at the top like the 3rd image, thread your tapestry needle through the large curls that are preventing it from closing and pull them tight to have a clean close
5. Fasten off with a knot
6. Weave in the remaining end
7. Cut off excess string
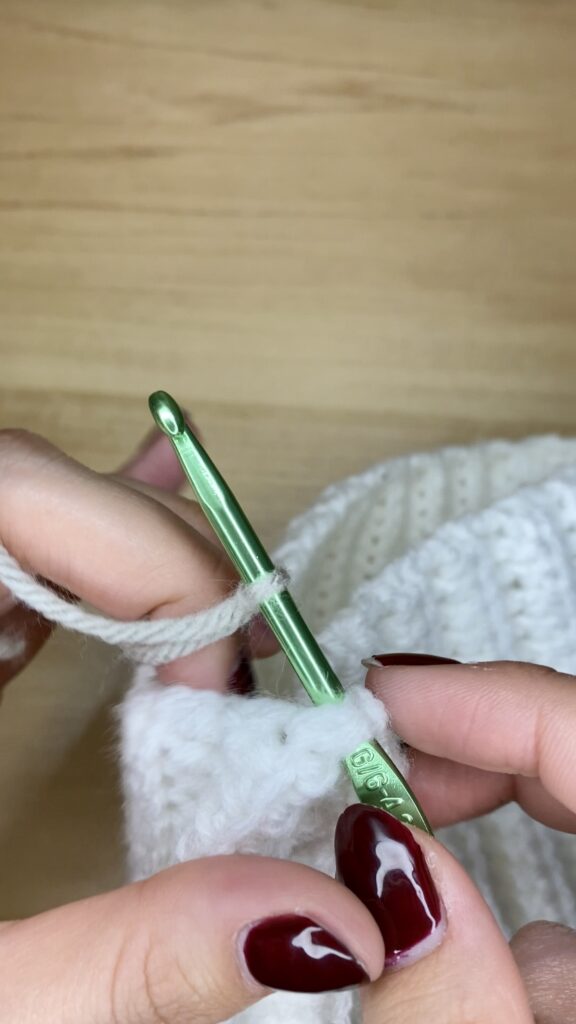
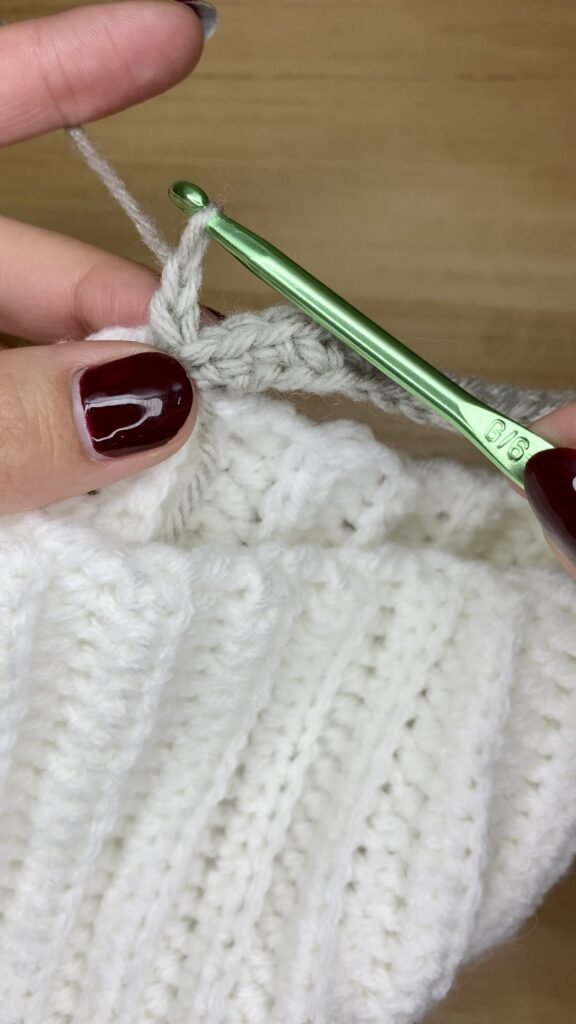
Ribbed Border of the Beanie
With your 4.25 mm hook —
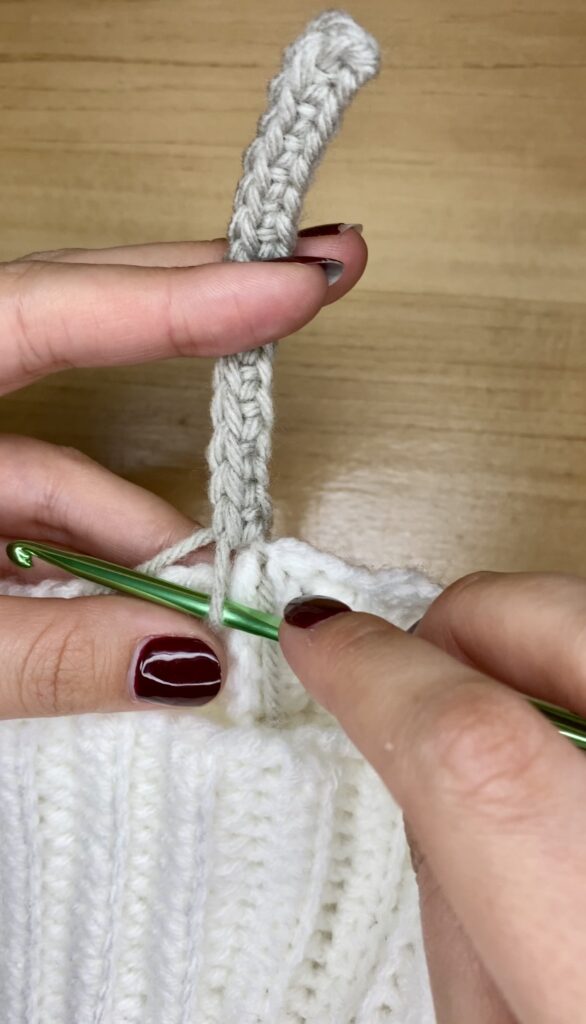
Attach the yarn to the back of the beanie near the sc join by making a sl knot, pulling it through the beanie with your hook and ch 1
This secures the ribbing to the beanie
Ch 15 (the ch 1 we did to secure counts so there should be 16 ch overall)
Turn your work
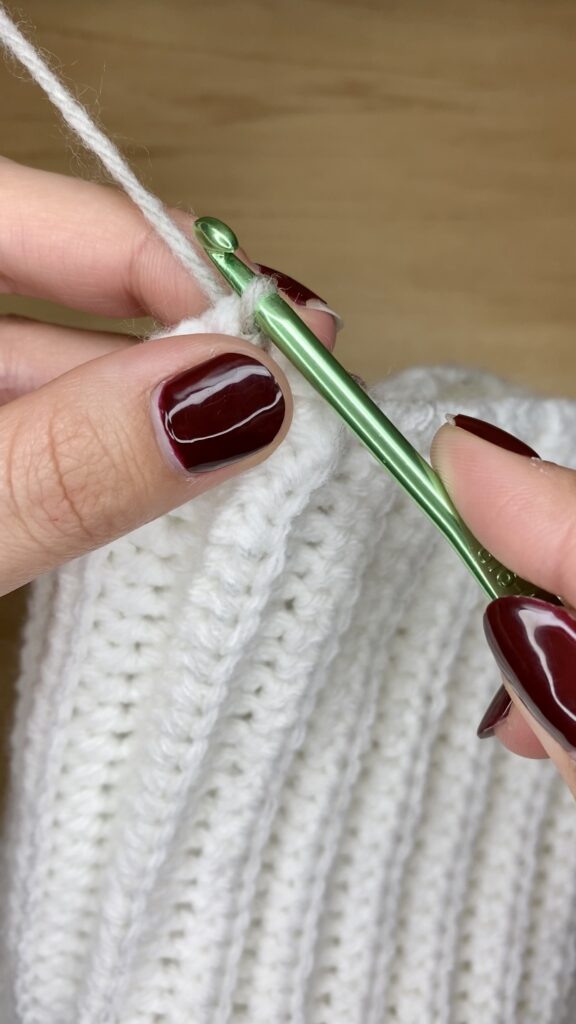
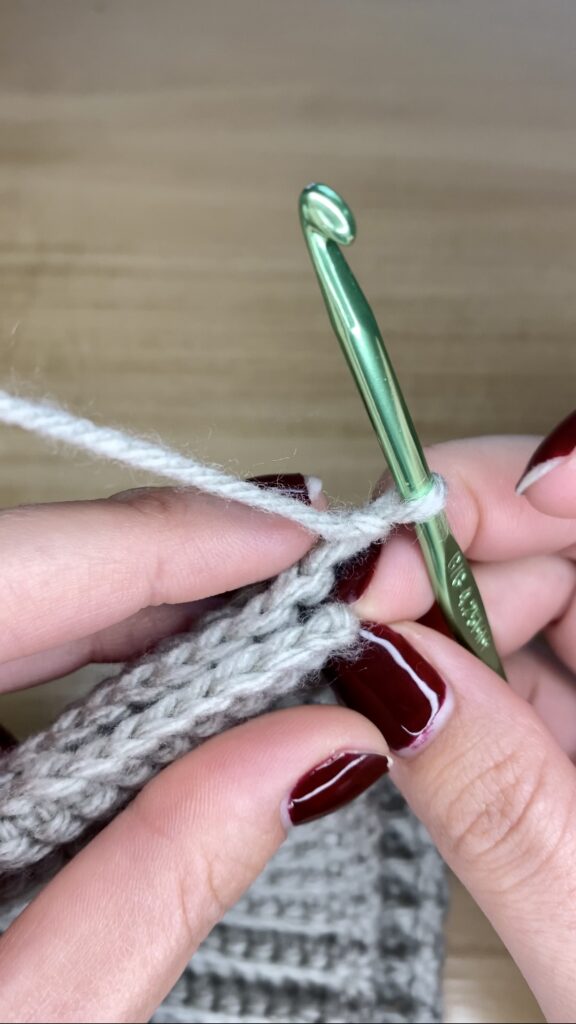
Row 1: skip the 1st st and sc into the 2nd st from the hook and sc across, ch 1 and turn
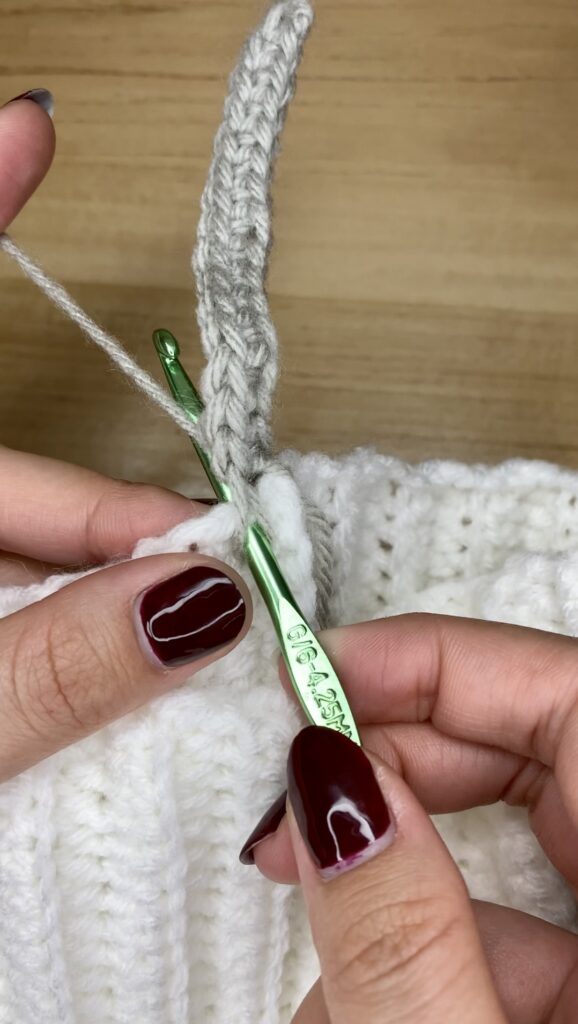
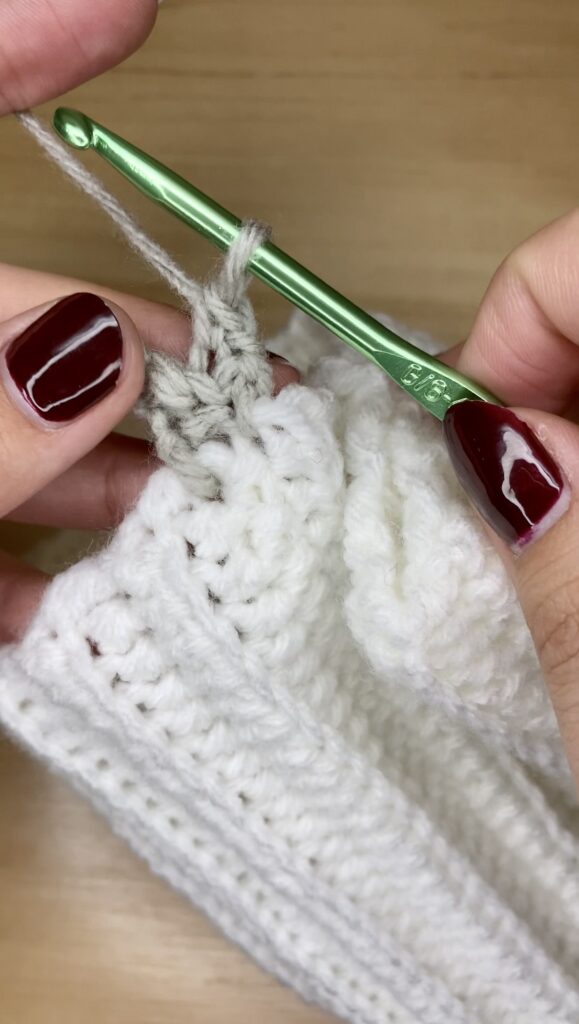
Row 2: in BLO sc across. Now we have reached the base of the beanie. Straighten your sc row and pull the loop on your hook down to measure where to anchor your ribbing. Once you have determined where to anchor, insert your hook through the beanie and pull the loose loop on your hook tight. sl st to anchor and ch 1. Turn your work
Row 3: sc across, ch 1 and turn
Repeat rows 2 and 3 until you have ribbing all around the beanie
You should end on an even row (you should be at the top of the ribbing)
Now join the 2 ends of the ribbing together on the back side of the beanie in the same way you joined the beanie together (with a sc row through both sides)
Note: the join should be on the inside of the ribbing when folded over the beanie so it is invisible
*If needed, anchor your row with another sl st to the beanie
Fasten off and weave end into the ribbed border
Pom Pom
With a pom pom maker —
1. Use pom pom maker as directed and attach the pom pom to the top of the beanie
If you do not have a pom pom maker —
1. Around your 4 fingers, wrap the yarn color used for the ribbing around your hand at least 60 times (this will produce a less dense pom pom)
Note: if you want a more dense and round pom pom, wrap the yarn around at least 80 times, more if you want a perfectly round looking pompom
2. Cut the yarn once you have wrapped it around your desired amount of times, cut the yarn
3. Cut another piece of yarn about 8 inches and tie around the center of the loops and tie off
4. Cut all of the loops now fasten in place by the yarn piece
5. Trim the pom pom as needed
6. Attach to the top of the beanie
All finished!
*Below is a more detailed version of the pattern written without abbreviations*
*Please see above for instructional photos*
Main Portion of the Beanie
With your 5 mm hook —
Chain 41
Row 1: Skip the first stitch and place a half double crochet in the 2nd stitch from the hook. Continue with half double crochet across the row (40), chain 1 and turn
Row 2: In the Back Loop Only half double crochet across (40), chain 1 and turn
Repeat row 2 until the number of rows can wrap around your head
*For me, this was 46 rows*
Joining the two ends of the beanie
After you have created the rectangle that will serve as the main portion of the beanie, the shorter ends of the rectangle need to be joined to form a tube
1. Currently on the hook, there is a chain 1 and the work has been turned. Line up both ends of the rectangle together and single crochet through BOTH ends of the rectangle and continue down the row.
2. Fasten off your piece and leave a long tail to close the beanie with
3. You will be left with a long tube that should fit comfortably on your head
4. The side of the beanie with the single crochet row is the inside of the beanie, therefore no one will see the join
Closing the top of the beanie
1. Thread the long tail you left from joining the beanie through the tapestry needle
2. Use the ribbing of the beanie as a guide to weave your needle through
3. See the pictures above
4. Pull the thread while pushing the beanie together until there are no holes
*Note: if there is a larger hole at the top like the 3rd image, thread your tapestry needle through the large curls that are preventing it from closing and pull them tight to have a clean close
5. Fasten off with a knot
6. Weave in the remaining end
7. Cut off excess string
Ribbed Border of the Beanie
With your 4.25 mm hook —
Attach the yarn to the back of the beanie near the single crochet join by making a slip knot, pulling it through the beanie with your hook and chain 1
This secures the ribbing to the beanie
Chain 15 (the chain 1 we did to secure counts so there should be 16 chains overall)
Turn your work
Row 1: skip the 1st stitch and single crochet into the 2nd stitch from the hook and single crochet across, chain 1 and turn
Row 2: in Back Loop Only single crochet across. Now we have reached the base of the beanie. Straighten your single crochet row and pull the loop on your hook down to measure where to anchor your ribbing. Once you have determined where to anchor, insert your hook through the beanie and pull the loose loop on your hook tight. slip stitch to anchor and chain 1. Turn your work
Row 3: single crochet across, chain 1 and turn
Repeat rows 2 and 3 until you have ribbing all around the beanie
You should end on an even row (you should be at the top of the ribbing)
Now join the 2 ends of the ribbing together on the back side of the beanie in the same way you joined the beanie together (with a single crochet row through both sides)
Note: the join should be on the inside of the ribbing when folded over the beanie so it is invisible
*If needed, anchor your row with another slip stitch to the beanie
Fasten off and weave end into the ribbed border
Pom Pom
With a pom pom maker —
1. Use pom pom maker as directed and attach the pom pom to the top of the beanie
If you do not have a pom pom maker —
1. Around your 4 fingers, wrap the yarn color used for the ribbing around your hand at least 60 times (this will produce a less dense pom pom)
Note: if you want a more dense and round pom pom, wrap around at least 100 times
2. Cut the yarn once you have wrapped it around your desired amount of times, cut the yarn
3. Cut another piece of yarn about 8 inches and tie around the center of the loops and tie off
4. Cut all of the loops now fasten in place by the yarn piece
5. Trim the pom pom as needed
6. Attach to the top of the beanie
All finished!
You are free to sell any completed items made from this pattern so long as I am credited for the pattern in the description of the item, and on social media posts. The completed items may be sold, but not mass produced.
You may not sell my patterns or claim them as your own.