
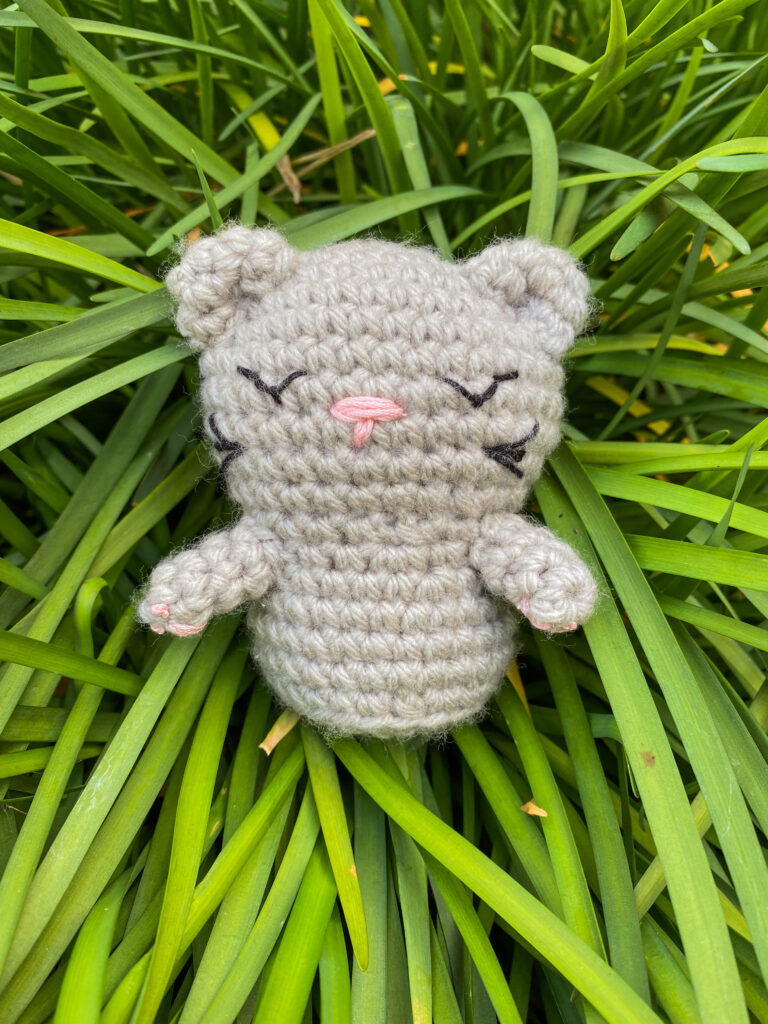
Beginner Friendly mini cat pattern
For my first pattern, I wanted to make something easy, that a beginner could follow along and complete. The best part is that it does not require a lot of yarn or time like other crochet projects! I hope you love your little cat that you have yet to create! Happy crocheting!
Please show me what you create! Tag me on Instagram or TikTok so I can see your little kitties!
Pattern Notes:
Patterns written in USA terms
Put the stitch marker in the 1st stitch in each round to keep track of your stitch count
Abbreviations:
Sc = single crochet
St = stitch
Inc = 2 single crochets in once stitch
Inv Dec = making one single crochet by joining two stitches in the front loops only
Materials used:
Yarn: Big Twist Value Yarn, weight 4 medium (Aran or Worsted yarn), about 20 grams
Hook: 4mm or G Hook
Pink and Black Embroidery Floss
Sewing pins
Fiber Fill
Locking stitch markers
Now that you have all of the necessary materials, let’s get started!
Head and Body
Rnd 1: magic ring with 6 sc (6)
Rnd 2: 3 sc in the 1st st, 2 sc in the 2nd st, 1 sc, repeat (12)
Rnd 3: 1 sc, inc in the next 3 sts, 4 sc, inc in the next 3 sts, 1 sc (18)
Rnd 4: 2 sc, (inc, sc)x3, 3 sc, (inc, sc)x3, 1 sc (24)
Rnd 5: 3 sc, (inc, sc)x3, 7 sc, (inc,sc)x3, 2 sc (30)
Rnd 6: 4 sc, (Inc, sc)x3, 11sc, (inc,sc)x3, 3 sc (36)
Rnd 7: sc around (36)
Rnd 8: sc around (36)
Rnd 9: sc around (36)
Rnd 10: 4 sc, (inv dec, sc)x3, 11 sc, (inv dec,sc)x3, 3 sc (30)
Rnd 11: 3 sc, (inv dec,sc)x3, 7 sc, (inv dec, sc)x3, 2 sc (24)
Rnd 12: 2 sc, (inv dec, sc)x3, 3 sc, (inv dec, sc) x3, 1 sc (18)
*end of the head portion of the piece*
Begin to stuff with fiber fill and continue as you continue to create the body portion
Rnd 13: 2 sc, (inc, sc)x3, 3 sc, (inc, sc)x3, 1 sc (24)
Rnd 14: 3 sc, (inc,sc)x3, 7 sc, (inc,sc)x3, 2 sc (30)
Rnd 15: sc around (30)
Rnd 16: sc around (30)
Rnd 17: sc around (30)
Rnd 18: 3 sc, (inv dec, sc)x3, 7 sc, (inv dec,sc)x3, 2 sc (24)
Rnd 19: *In back loop only* 2 sc, (inv dec, sc)x3, 3 sc, (inv dec,sc)x3, 1 sc (18)
Rnd 20: 1 sc, inv dec in the next 3 st, 4 sc, inv dec in the next 3 st, 1 sc (12)
Rnd 21: inv dec with 3 st instead of 2, regular inv dec, sc, repeat (6)
Close and fasten off the piece
Ears x2
Rnd 1: magic ring with 5 sc (5)
Rnd 2: 5 inc (10)
Rnd 3: sc, inc, 5 times (15)
Fasten off piece and leave a long string for sewing the ear onto the head and body
Flatten the piece and fold in half widthwise to get the ear shape
Arms x2
Rnd 1: magic ring with 5 sc (5)
Rnd 2-4: sc around (5)
Fasten off piece and leave a long string for sewing the ear onto the head and body
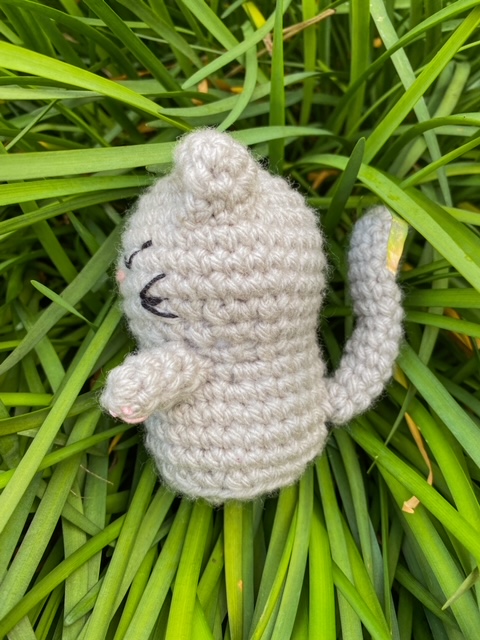
Tail
Rnd 1: magic ring with 6 sc (6)
Rnd 2-14: sc around (6)
Fasten off piece and leave a long string for sewing the ear onto the head and body
Sewing Instructions:
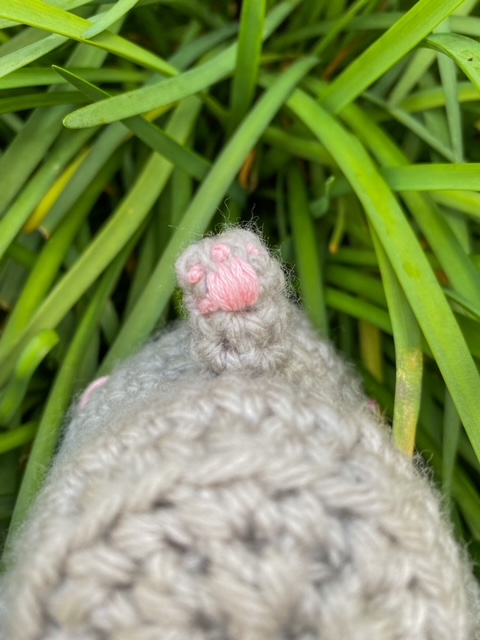
1. Pin the ears on either side of the head with the inner side on round three, slightly more forward on the head. Once happy with the ear placement, sew in place
2. Pin the arms in the decrease between the head and the body, slightly more forward than the sides of the piece, once happy with the placement, sew in place
4. Embroider the eyes, and whiskers with black yarn. The eyes should be placed between the 7th and the 8th rows of the head, the point of the whiskers should be between the 9th and 10th row of the head piece
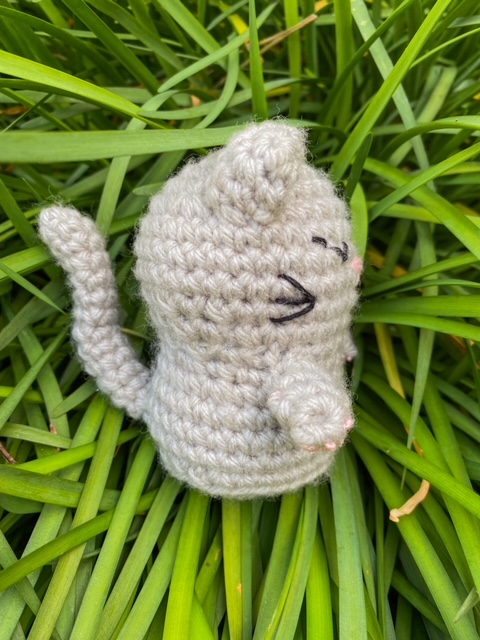
5. Pin the tail to the back of the head and body piece, towards the bottom and centered. Once happy with the placement, sew in place
6. Embroider the nose and the toe beans in the pink embroidery floss. The nose should be between the 8th and the 9th rows in the center of the head piece. The paws should be sewn on the underside of the arms, near the tips. I used sewing knots for the toes and as for sewing the pads of the paw, I accomplished that by repeating the same technique with the nose, repeatedly sewing the same stitch over and over to create volume
*Below is a more detailed version of the pattern (without abbreviations)
Head and Body
Rnd 1: Magic ring with 6 single crochets (6)
Rnd 2: 3 single crochets in the 1st stitch, 2 single crochets in the 2nd stitch, 1 single crochet in the 3rd stitch, repeat (12)
Rnd 3: 1 single crochet, increase in the next three stitches, 4 single crochets, increase in the next three stitches, 1 single crochet (18)
Rnd 4: 2 single crochets, 1 increase, 1 single crochet, 1 increase, 1 single crochet, 1 increase, 1 single crochet, 3 single crochets, 1 increase, 1 single crochet, 1 increase, 1 single crochet, 1 increase, 1 single crochet, 1 single crochet (24)
Rnd 5: 3 single crochets, increase, 1 single crochet, increase, 1 single crochet, increase, 1 single crochet, 7 single crochets, 1 increase, 1 single crochet, 1 increase, 1 single crochet, 1 increase, 1 single crochet, 2 single crochets (30)
Rnd 6: 4 single crochets, 1 increase, 1 single crochet, 1 increase, 1 single crochet, 1 increase, 1 single crochet, 11 single crochets, 1 increase, 1 single crochet, 1 increase, 1 single crochet, 1 increase, 1 single crochet, 3 single crochets (36)
Rnd 7: single crochet around (36)
Rnd 8: single crochet around (36)
Rnd 9: single crochet around (36)
Rnd 10: 4 single crochets, 1 invisible decrease, 1 single crochet, 1 invisible decrease, 1 single crochet, 1 invisible decrease, 1 single crochet, 11 single crochets, 1 invisible decrease, 1 single crochet, 1 invisible decrease, 1 single crochet, 1 invisible decrease, 1 single crochet, 3 single crochets (30)
Rnd 11: 3 single crochets, 1 invisible decrease, 1 single crochet, 1 invisible decrease, 1 single crochet, 1 invisible decrease, 1 single crochet, 7 single crochets, 1 invisible decrease, 1 single crochet, 1 invisible decrease, 1 single crochet, 1 invisible decrease, 1 single crochet, 2 single crochets (24)
Rnd 12: 2 single crochets, 1 invisible decrease, 1 single crochet, 1 invisible decrease, 1 single crochet, 1 invisible decrease, 1 single crochet, 3 single crochets, 1 invisible decrease, 1 single crochet, 1 invisible decrease, 1 single crochet, 1 invisible decrease, 1 single crochet, 1 single crochet (18)
*end of the head portion of the piece*
Begin to stuff piece with fiber fill and continue to stuff as you move along
Rnd 13: 2 single crochets, 1 increase, 1 single crochet, 1 increase, 1 single crochet, 1 increase, 1 single crochet, 3 single crochets, 1 increase, 1 single crochet, 1 increase, 1 single crochet, 1 increase, 1 single crochet, 1 single crochet (24)
Rnd 14: 3 single crochets, increase, 1 single crochet, increase, 1 single crochet, increase, 1 single crochet, 7 single crochets, 1 increase, 1 single crochet, 1 increase, 1 single crochet, 1 increase, 1 single crochet, 2 single crochets (30)
Rnd 15: single crochet around (30)
Rnd 16: single crochet around (30)
Rnd 17: single crochet around (30)
Rnd 18: 3 single crochets, 1 invisible decrease, 1 single crochet, 1 invisible decrease, 1 single crochet, 1 invisible decrease, 1 single crochet, 7 single crochets, 1 invisible decrease, 1 single crochet, 1 invisible decrease, 1 single crochet, 1 invisible decrease, 1 single crochet, 2 single crochets (24)
Rnd 19: *IN THE BACK LOOP ONLY* 2 single crochets, 1 invisible decrease, 1 single crochet, 1 invisible decrease, 1 single crochet, 1 invisible decrease, 1 single crochet, 3 single crochets, 1 invisible decrease, 1 single crochet, 1 invisible decrease, 1 single crochet, 1 invisible decrease, 1 single crochet, 1 single crochet (18)
Rnd 20: 1 single crochet, invisible decrease 3 times, 4 single crochets, invisible decrease 3 times, 1 single crochet
Rnd 21: Invisible decrease the next 3 stitches to 1, 1 normal invisible decrease, 1 single crochet, Repeat
Fasten off your piece
Ears x2
Rnd 1: Magic ring with 5 single crochets (5)
Rnd 2: 5 increases (10)
Rnd 3: 1 single crochet, 1 increase, repeat 5 times (15)
Fasten off piece and leave long string for sewing onto head and body piece
Flatten the piece and fold in half widthwise to get the ear shape
Arms x2
Rnd 1: Magic ring with 5 single crochets (5)
Rnd 2-4: single crochet around (5)
Fasten off piece and leave long string for sewing onto head and body piece
Tail
Rnd 1: Magic ring with 6 single crochets (6)
Rnd 2-14: single crochet around (6)
Fasten off piece and leave long string for sewing onto head and body piece
Sewing Instructions:
1. Pin the ears on either side of the head with the inner side on round three, slightly more forward on the head. Once happy with the ear placement, sew in place
2. Pin the arms in the decrease between the head and the body, slightly more forward than the sides of the piece, once happy with the placement, sew in place
3. Embroider the eyes, and whiskers with black yarn. The eyes should be placed between the 7th and the 8th rows of the head, the point of the whiskers should be between the 9th and 10th row of the head piece
4. Embroider the nose and the toe beans in the pink embroidery floss. The nose should be between the 8th and the 9th rows in the center of the head piece. The paws should be sewn on the underside of the arms, near the tips. I used sewing knots for the toes and as for sewing the pads of the paw, I accomplished that by repeating the same technique with the nose, repeatedly sewing the same stitch over and over to create volume
5. Pin the tail to the back of the head and body piece, towards the bottom and centered. Once happy with the placement, sew in place
6. Embroider the nose and the toe beans in the pink embroidery floss. The nose should be between the 8th and the 9th rows in the center of the head piece. The paws should be sewn on the underside of the arms, near the tips. I used sewing knots for the toes and as for sewing the pads of the paw, I accomplished that by repeating the same technique with the nose, repeatedly sewing the same stitch over and over to create volume
If you find any errors in this pattern, please let me know! I will be more than happy to adjust to bring more clarification
You are free to sell any completed plushies made from this pattern so long as I am credited for the pattern in the description of the item, and on social media posts. The completed items may be sold but not mass produced.
You may not sell my patterns or claim them as your own.
Happy Crocheting!