
Gemstone Ring Amigurumi Pattern
I got engaged in August and decided to make a gemstone ring out of yarn that you can make for anyone! Including yourself of course! Who doesn’t need a little bling?
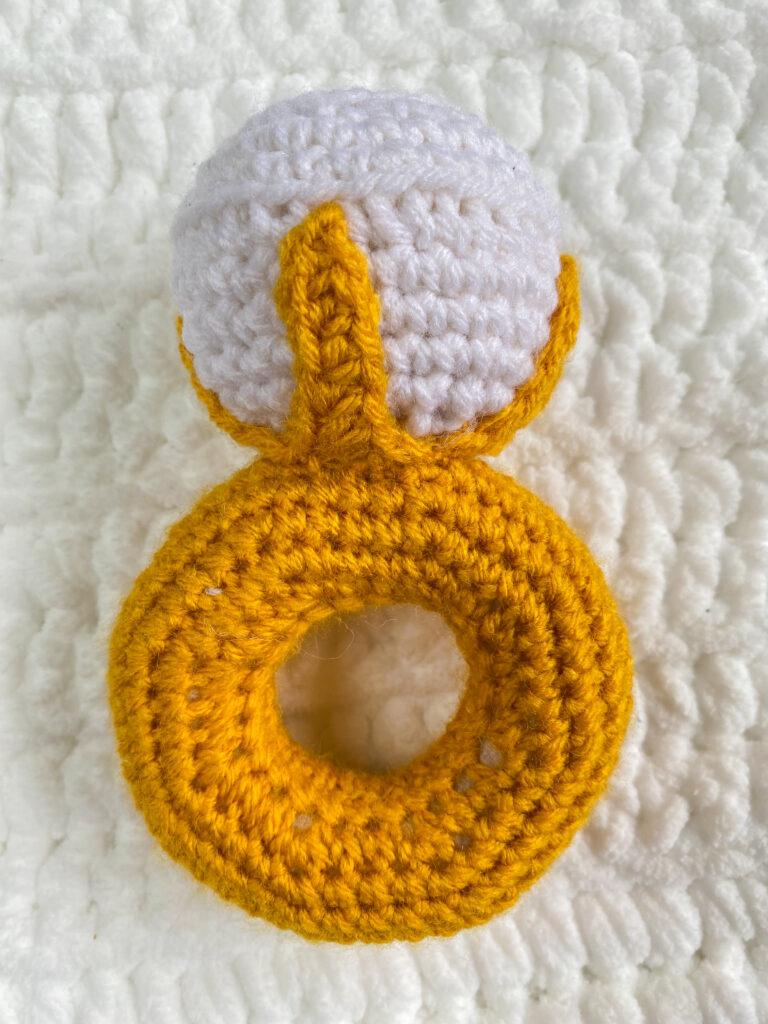
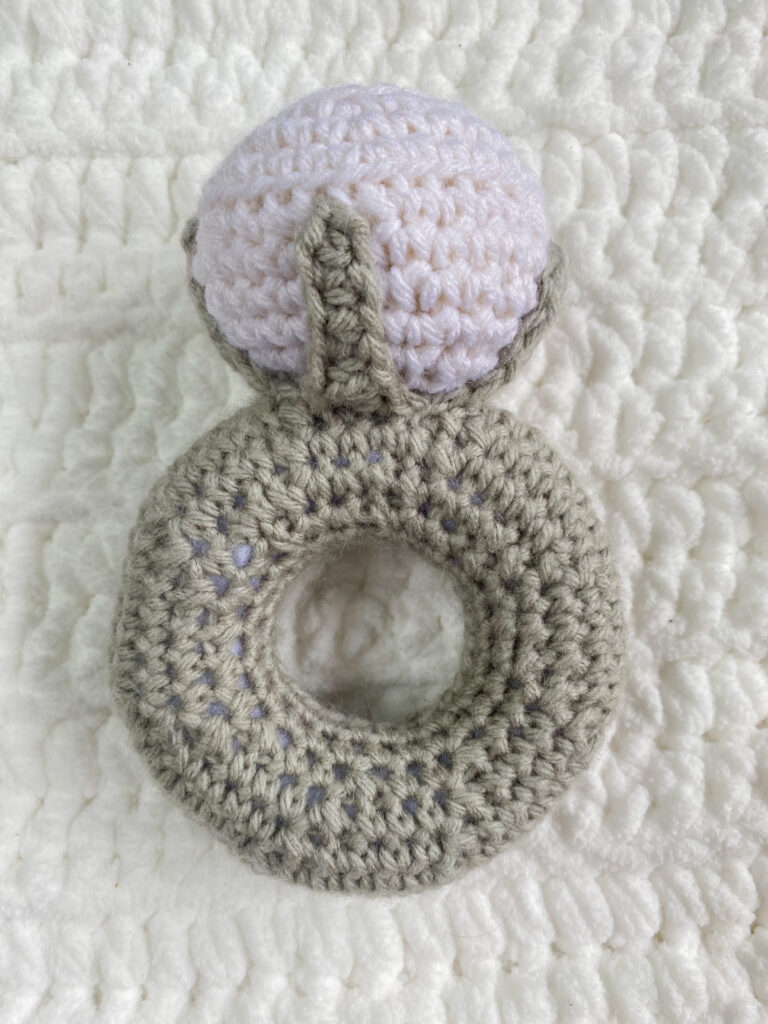
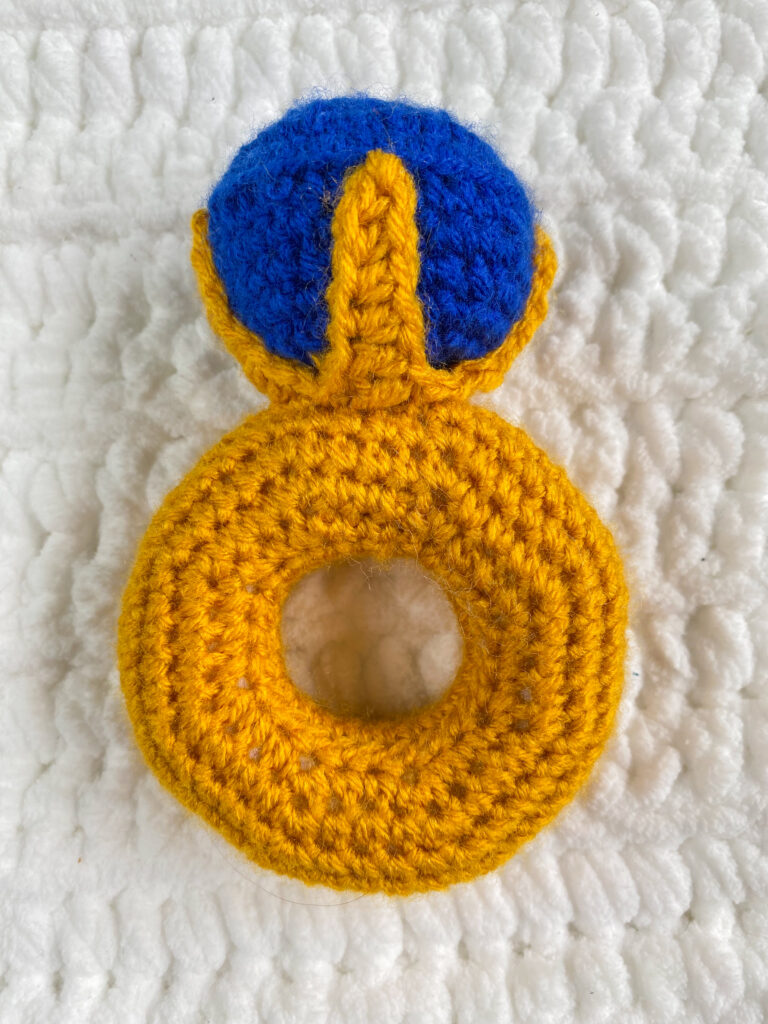
The best part of this pattern is that it is completely customizable, you can use whatever color you want for the gemstone, band and setting, even change the size of the center stone! You can build your dream ring with yarn! Below are a couple of examples of stone and band color options.
Whether this is used as a template for your dream engagement ring or just a ring that you want to wear as an everyday ring, this pattern is perfect for all!
I am so excited to see all of the finished makes on Instagram and TikTok! I am @crochetwithkathryn on both platforms! Tag me when you use this pattern or another one of my patterns 😀 Happy crocheting fiber artists!
Pattern Notes:
Pattern is written in USA terms
Use the locking stitch markers in the first stitch of every round so you can always keep track of your stitch count
Yarn used is worsted weight
Materials Used:
Yarn:
– White or alternate color yarn for gemstone (approx. 8g)
– Grey or gold (or any other color) yarn for band (approx. 14g)
Hook – 4mm crochet or G
Locking stitch markers
Sewing pins
Tapestry needle
Fiber fill
Abbreviations:
MR – magic ring
sl st – slip stitch
sc – single crochet
st – stitch
ch – chain
hdc – half double crochet
dc – double crochet
Rnd – round
BLO – back loop only
inc – increase (two stitches in one stitch)
inv dec – invisible decrease (decreasing in front loops only of the stitches) \
Now that we have everything, let’s get started!
Band:
Chain 24
Sl st into the first chain to make a round
Rnd 1: (2 sc, inc) x8 (32)
Rnd 2: (3 sc, inc) x8 (40)
Rnd 3: (4 sc, inc) x8 (48)
Rnd 4: (5sc, inc) x8 (56)
Rnd 5-6: sc around (56)
Rnd 7: (5 sc, inv dec) x8 (48)
Rnd 8: (4sc, inv dec) x8 (40)
Rnd 9: (3sc, inv dec) x8 (32)
Rnd 10: (2sc, inv dec) x8 (24)
Rnd 11-12: sc around (24)
*Sew ring together, adding fiber fill as you close the ring. Weave in ends
Gemstone:
Rnd 1: MR with 6 sc (6)
Rnd 2: inc in each st (12)
Rnd 3: (1sc, inc) x6 (18)
Rnd 4: (2sc, inc) x6 in BLO (24)
Rnd 5: (3sc, inc) x6 (30)
Rnd 6: (4sc, inc) x6 (36)
Rnd 7: (4 sc, inv dec) x6 in BLO (30)
Rnd 8: sc around (30)
Rnd 9: (3 sc, inv dec) x6 (24)
Rnd 10: sc around (24)
Rnd 11: (2sc, inv dec) x6 (18)
*Begin stuffing with fiberfill
Rnd 12: (1 sc, inv dec) x6 (12)
Rnd 13: inv dec around (6)
*Fasten off piece and weave in ends
Bigger Gemstone (just in case you want a bigger stone!):
Rnd 1: MR with 6 sc (6)
Rnd 2: inc in each st (12)
Rnd 3: (1sc, inc) x6 (18)
Rnd 4: (2sc, inc) x6 (24)
Rnd 5: (3sc, inc) x6 in BLO (30)
Rnd 6: (4sc, inc) x6 (36)
Rnd 7: (5sc, inc) x6 (42)
Rnd 8: (5 sc, inv dec) x6 in BLO (36)
Rnd 9: sc around (36)
Rnd 10: (4 sc, inv dec) x6 (30)
Rnd 11: sc around (30)
Rnd 12: (3 sc, inv dec) x6 (24)
Rnd 13: sc around (24)
Rnd 14: (2 sc, inv dec) x6 (18)
*Begin stuffing with fiber fill
Rnd 15: (1sc, inv dec)x6 (12)
Rnd 16: inv dec around (6)
*Fasten off piece and weave in ends
Setting:
Rnd 1: MR with 6 sc (6)
Rnd 2: inc in all sts (12)
Rnd 3: (1 sc, ch 7, sc in 2nd chain from hook, 3 hdc, 2 dc, skip a stitch in the round of the band, sc to secure) x4
*Fasten off and leave very long tail for sewing
Assembly Instructions:
1. Pin the finished setting onto the gemstone and adjust as needed until you are happy with placement
2. With the long strand hanging from the setting, sew the gemstone and the setting together
3. Pin the now attached gemstone and setting onto the band. Adjust placement as needed
4. Once happy with the placement of the gemstone and setting, using a strand of the color used for the setting and the band, sew together
And you’re done!
*Below is a more detailed version of the pattern that does not have abbreviations
Band:
Chain 24
Round 1: (2 single crochets, then increase) x8 (32)
Round 2: (3 single crochets, then increase) x8 (40)
Round 3: (4 single crochets, then increase) x8 (48)
Round 4: (5 single crochets, then increase) x8 (56)
Round 5-6: single crochet around (56)
Round 7: (5 single crochets, then decrease) x8 (48)
Round 8: (4 single crochets, then decrease) x8 (40)
Round 9: (3 single crochets, then decrease) x8 (32)
Round 10: (2 single crochets, then decrease) x8 (24)
Round 11-12: single crochet around (24)
*Sew ring together, adding fiber fill as you close the ring. Weave in ends
Gemstone:
Round 1: Magic ring with 6 single crochets (6)
Round 2: Increase in each stitch (12)
Round 3: (1 single crochet, then increase) x6 (18)
Round 4: (2 single crochet, then increase) x6 in back loop only(24)
Round 5: (3 single crochet, then increase) x6 (30)
Round 6: (4 single crochet, then increase) x6 (36)
Round 7: (4 single crochet, then invisible decrease) in back loop only x6 (30)
Round 8: single crochet around (30)
Round 9: (3 single crochet, then invisible decrease) x6 (24)
Round 10: single crochet around (24)
Round 11: (2 single crochet, then invisible decrease) x6 (18)
*Begin stuffing with fiber fill
Round 12: (1 single crochet, then invisible decrease) x6 (12)
Round 13: invisible decrease in each stitch (6)
*Fasten off piece and weave in ends
Bigger Gemstone (just in case you want a bigger stone!):
Round 1: Magic ring with 6 single crochets (6)
Round 2: Increase in each stitch (12)
Round 3: (1 single crochet, then increase) x6 (18)
Round 4: (2 single crochet, then increase) x6 (24)
Round 5: (3 single crochet, then increase) x6 in back loop only (30)
Round 6: (4 single crochet, then increase) x6 (36)
Round 7: (5 single crochet, then increase) x6 (42)
Round 8: (5 single crochet, then invisible decrease) x6 in back loop only (42)
Round 9: single crochet around (42)
Round 10: (4 single crochet, then invisible decrease) x6 (36)
Round 11: single crochet around (36)
Round 12: (3 single crochet, then invisible decrease) x6 (24)
Round 13: single crochet around (24)
Round 14: (2 single crochet, then invisible decrease) x6 (18)
*Begin stuffing with fiber fill
Round 15: (1 single crochet, then invisible decrease) x6 (12)
Round 16: invisible decrease in each stitch (6)
*Fasten off piece and weave in ends
Setting:
Round 1: Magic ring with 6 single crochets (6)
Round 2: increase in all stitches (12)
Round 3: 1 single crochet, chain 7, single crochet in the 2nd chain from the house, followed by 3 half double crochets, then 2 double crochets. You have now reached the end of the chain. On the band, skip one stitch, in the following stitch, single crochet to secure. Repeat 3 more times until you have reached the end of the round
*Fasten off and leave a very long tail for sewing
Assembly Instructions:
1. Pin the finished setting onto the gemstone and adjust as needed until you are happy with placement
2. With the long strand hanging from the setting, sew the gemstone and the setting together
3. Pin the now attached gemstone and setting onto the band. Adjust placement as needed
4. Once happy with the placement of the gemstone and setting, using a strand of the color used for the setting and the band, sew together
All finished!
You are free to sell any completed plushies made from this pattern so long as I am credited for the pattern in the description of the item, and on social media posts. The completed items may be sold, but not mass produced.
You may not sell my patterns or claim them as your own.
Happy Crocheting!