
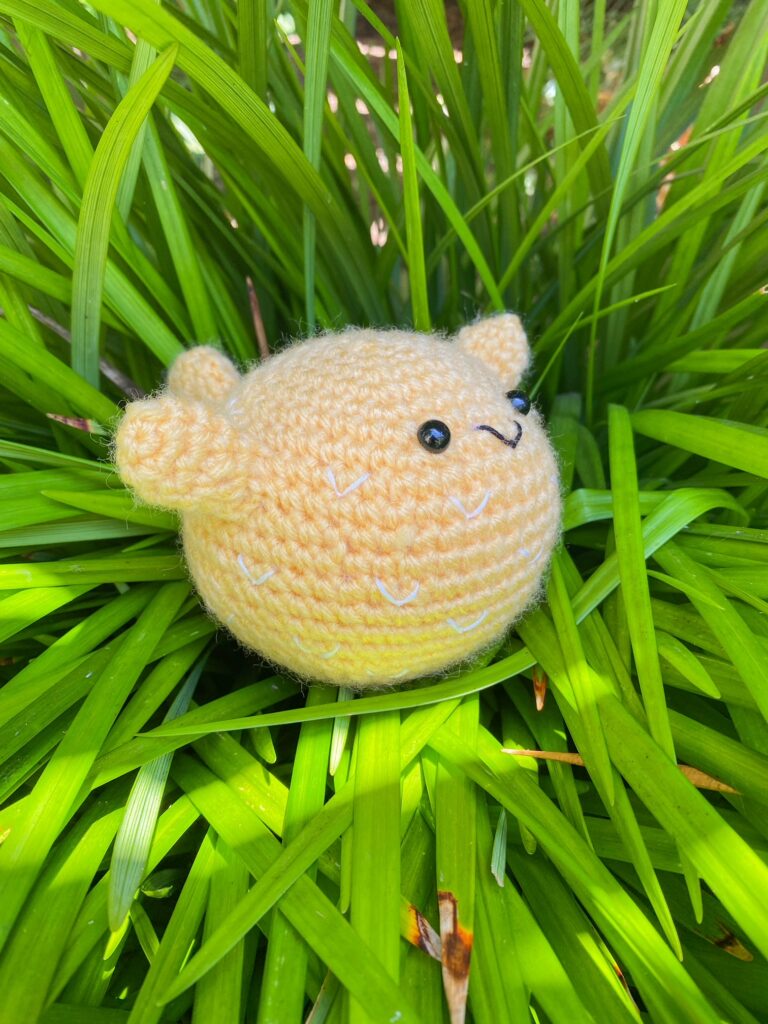
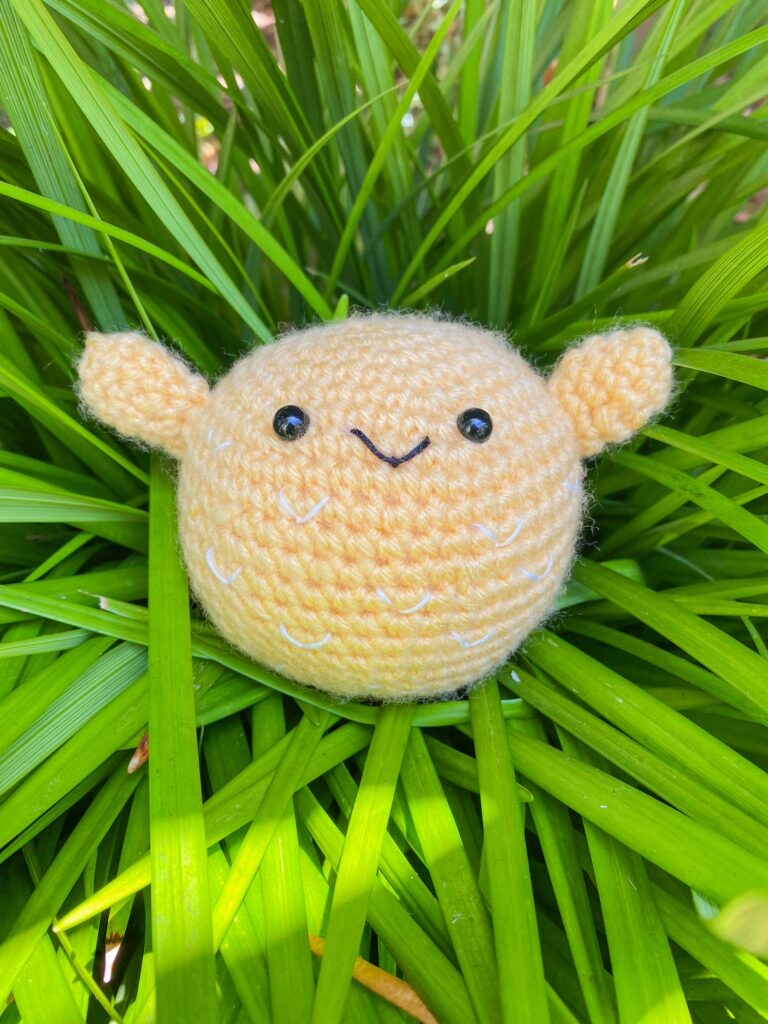
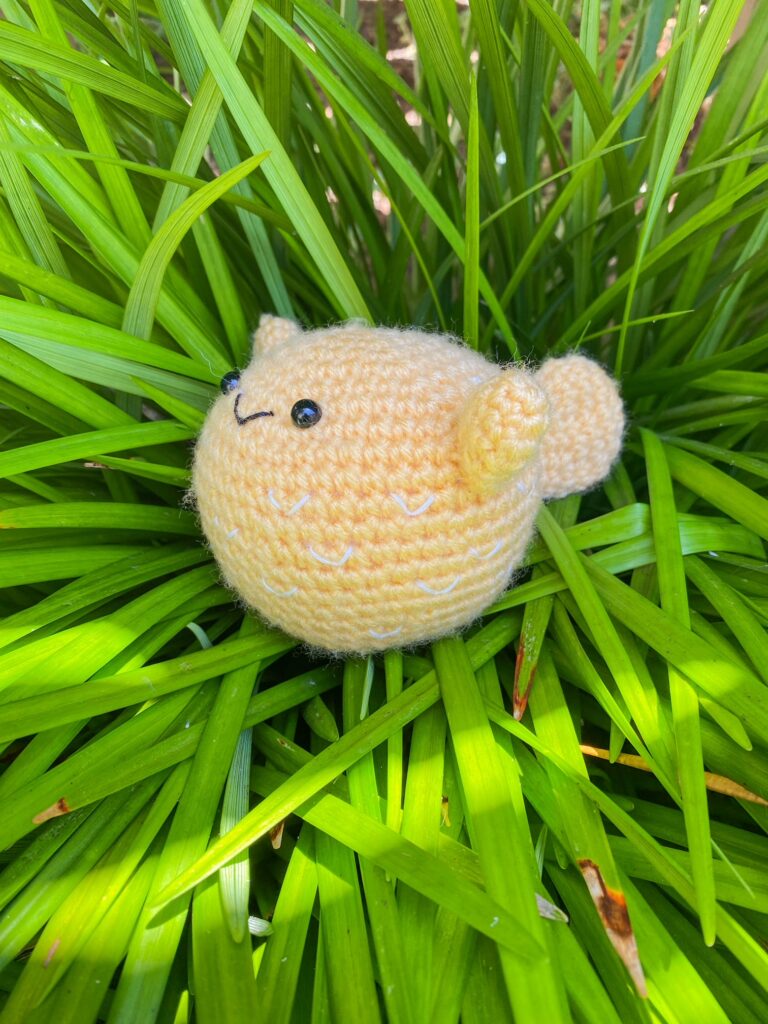
Pufferfish Amigurumi Pattern
Inspired by the sea, the pufferfish pattern is a cute, easy and quick project! Made up of only the simplest stitches in crochet, this pattern is perfect for those of any level! The best part? You only need one color of yarn! Limited time, and limited materials needed!
I am so excited to see what you make! Please tag me on Instagram and TikTok with your completed projects! I am @crochetwithkathryn on all platforms! Happy crocheting fiber artists!
Pattern Notes:
Patterns is written in USA terms
Use the locking stitch marker in the first stitch of every round so that you can always keep track of your stitch count
Materials Used:
Yarn – Pale yellow yarn, worsted weight
Hook – 4mm hook or G
White embroidery floss
Black embroidery floss
Safety eyes
Plastic washers (optional)
Locking stitch markers
Tapestry needle
Sewing pins
Fiber fill
Abbreviations:
MR – magic ring
sc – single crochet
st – stitch
Rnd – round
inc – increase (two stitches in one stitch)
inv dec – invisible decrease (decreasing in only the front loops of the stitches)
Now that we have everything, let’s get started!
Main Body Piece:
Rnd 1: MR with 6 sc (6)
Rnd 2: Inc in all sts (12)
Rnd 3: 1 sc, 1 inc, x6 (18)
Rnd 4: 2 sc, 1 inc, x6 (24)
Rnd 5: 3 sc, 1 inc, x6 (30)
Rnd 6: 4 sc, 1 inc, x6 (36)
Rnd 7: 5 sc, 1 inc, x6 (42)
Rnd 8: 6 sc, 1 inc, x6 (48)
Rnd 9- 11: sc around (3 rounds total) (48)
Rnd 12: 7 sc, 1 inc, x6 (54)
Rnd 13: 7 sc, 1 inv dec, x6 (48)
*place the safety eyes with the plastic washers between rows 7 and 8, 5 stitches apart*
Rnd 14 – 16: sc around (3 rounds total) (48)
*begin to stuff piece with fiberfill*
Rnd 17: 6 sc, 1 inv dec, x6 (42)
Rnd 18: 5 sc, 1 inv dec, x6 (36)
Rnd 19: 4 sc, 1 inv dec, x6 (30)
Rnd 20: 3 sc, 1 inv dec, x6 (24)
Rnd 21: 2 sc, 1 inv dec, x6 (18)
*finish stuffing piece*
Rnd 22: 1 sc, 1 inv dec, x6 (12)
Rnd 23: inv dec in each st (6)
*Fasten off piece and weave in ends
Fins x2:
Rnd 1: MR with 4 sc (4)
Rnd 2: Inc x4 (8)
Rnd 3: 3 sc, 1 inc, x2 (10)
Rnd 4: 3 sc, 1 inv dec x2 (8)
Rnd 5: 2 sc, inv dec x2 (6)
Rnd 6: sc around (6)
*Flatten piece
*Fasten off piece and leave a long tail for sewing
Tail:
Rnd 1: MR with 6 sc (6)
Rnd 2: Inc x6 (12)
Rnd 3: 1 sc, 1 inc, x6 (18)
Rnd 4: 2 sc, 1 inc, x6 (24)
Rnd 5: 2 sc, 1 inv dec, x6 (18)
Rnd 6: 1 sc, 1 inv dec (12)
Rnd 7- 8: sc around (2 rounds total) (12)
Rnd 9: inv dec x6 (6)
*Flatten piece
*Fasten off and leave long tail for sewing
Assembly Instructions:
1. Pin the fins with the sewing pins on either side of the main body piece, the top of the fins should be between rounds 8 and 9. Once satisfied with the placement of the fins, sew onto the fins in place
2. Pin the tail to the back of the main body piece, the top of the fins should be between rounds 11 and 12. Once satisfied wit hthe placement of the fins, sew the tail in place
3. To add the final details, sew the mouth with the black embroidery floss between the eyes of the pufferfish. Using the same technique as sewing the mouth, sew the spines of the pufferfish all around the body with the white embroidery floss
Below is a more detailed version of the pattern without abbreviations
Main Body Piece:
Round 1: Magic Ring with 6 single crochets (6)
Round 2: Increase in all stitches (12)
Round 3: 1 single crochet, 1 increase, repeat 5 times (18)
Round 4: 2 single crochet, 1 increase, repeat 5 times (24)
Round 5: 3 single crochet, 1 increase, repeat 5 times (30)
Round 6: 4 single crochet, 1 increase, repeat 5 times (36)
Round 7: 5 single crochet, 1 increase, repeat 5 times (42)
Round 8: 6 single crochet, 1 increase, repeat 5 times (48)
Round 9 – 11: single crochet around (3 rounds total) (48)
Round 12: 7 single crochet, 1 increase, repeat 5 times (54)
Round 13: 7 single crochet, 1 invisible decrease, repeat 5 times (48)
*place the safety eyes with the plastic washers between rows 7 and 8, 5 stitches apart*
Round 14 – 16: single crochet around (3 rounds total) (48)
*begin stuffing with fiberfill
Round 17: 6 single crochet, 1 invisible decrease, repeat 5 times (42)
Round 18: 5 single crochet, 1 invisible decrease, repeat 5 times (36)
Round 19: 4 single crochet, 1 invisible decrease, repeat 5 times (30)
Round 20: 3 single crochet, 1 invisible decrease, repeat 5 times (24)
Round 21: 2 single crochet, 1 invisible decrease, repeat 5 times (18)
*finished stuffing piece
Round 22: 1 single crochet, 1 invisible decrease, repeat 5 times (12)
Round 23: Invisible decrease six times (6)
*Fasten off piece and weave in end
Fins x2:
Round 1: Magic ring with 4 single crochets (4)
Round 2: Increase in all stitches (8)
Round 3: 3 single crochets, 1 increase, x2 (10)
Round 4: 3 single crochet 1 invisible decrease x2 (8)
Round 5: 2 single crochet, invisible decrease x2 (6)
Round 6: single crochet around (6)
*Flatten piece
*Fasten off piece and leave a long tail for sewing
Tail:
Round 1: Magic Ring with 6 single crohets (6)
Round 2: Increase in each stitch (12)
Round 3: 1 single crochet, 1 increase, x6 (18)
Round 4: 2 single crochet, 1 increase, x6 (24)
Round 5: 2 single crochet, 1 invisible decrease, x6 (18)
Round 6: 1 single crochet, 1 invisible decrease (12)
Round 7- 8: single crochet around (2 rounds total) (12)
Round 9: invisible decrease x6 (6)
*Flatten piece
*Fasten off and leave long tail for sewing
Assembly Instructions:
1. Pin the fins with the sewing pins on either side of the main body piece, the top of the fins should be between rounds 8 and 9. Once satisfied with the placement of the fins, sew onto the fins in place
2. Pin the tail to the back of the main body piece, the top of the fins should be between rounds 11 and 12. Once satisfied wit hthe placement of the fins, sew the tail in place
3. To add the final details, sew the mouth with the black embroidery floss between the eyes of the pufferfish. Using the same technique as sewing the mouth, sew the spines of the pufferfish all around the body with the white embroidery floss
All finished!
You are free to sell any completed plushies made from this pattern so long as I am credited for the pattern in the description of the item, and on social media posts. The completed items may be sold, but not mass produced.
You may not sell my patterns or claim them as your own.
Happy Crocheting!