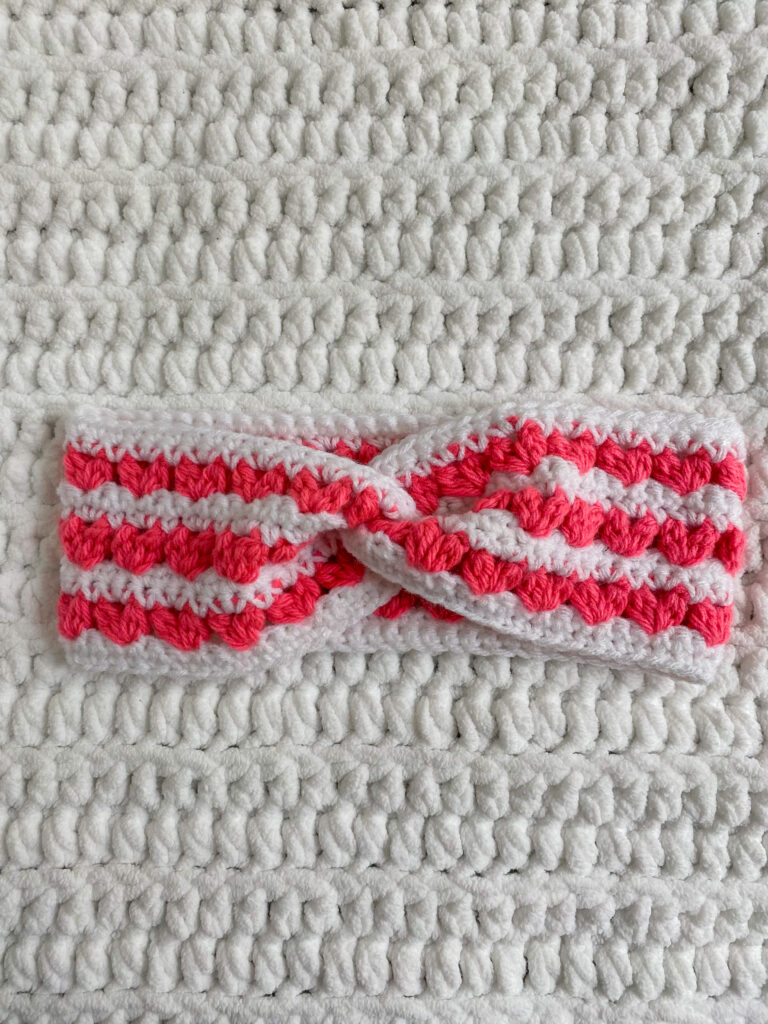
Valentine’s Day has come and past but it is never too late to plan for next year! The Heart Headband is a great gift for another occasion such as a birthday. A heartfelt, handmade gift is always a great idea, especially when you can customize it exactly to your loved one in both size AND style by making it in their favorite colors <3
Not only is it cute and festive, but it is also practical! It has been very cold this winter and the Heart Headband will keep your ears warm while you’re out battling the elements.
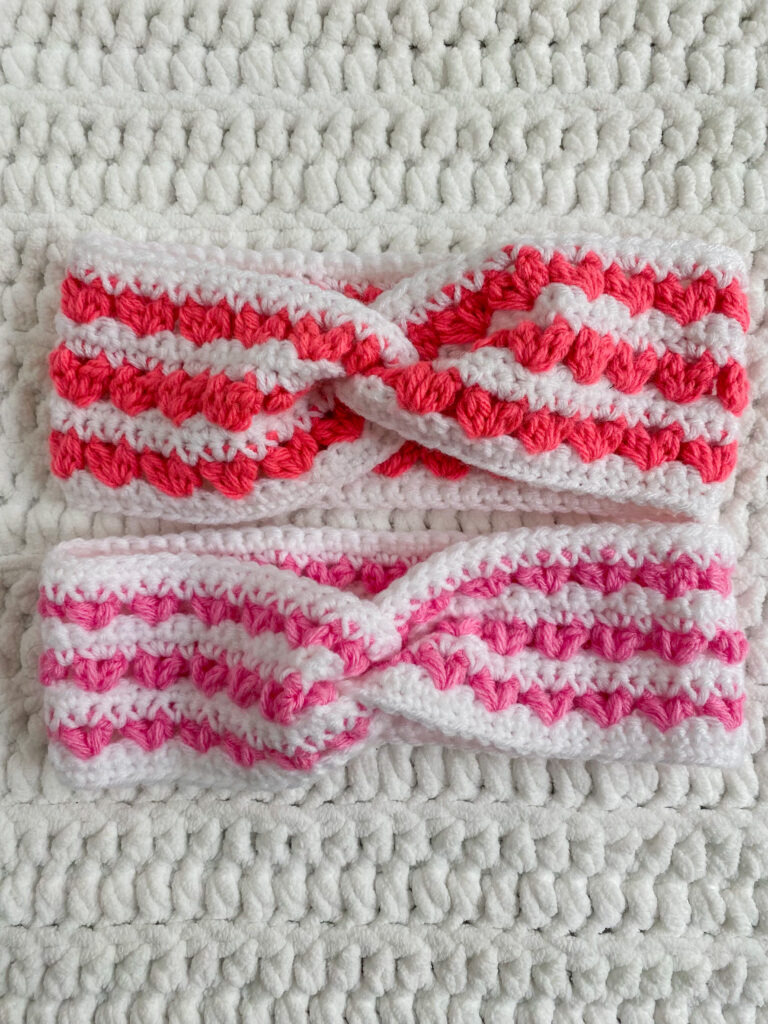
Whether you are a fan of the traditional Valentine’s Day colors or want to change it up entirely, you are free to do so with this pattern! Any colors you can think of will turn out really cute! No need to sport this accessory during the Valentine’s season only, it is suitable for any time of year because a little love is always a welcome addition to any outfit.
My inspiration for the Heart Headband was very simple; I am ALWAYS cold and need something to cover my ears and keep heat in. Also, I am not a fan of my hair in my face so voila! The Heart Headband was born!
If you also suffer from always being cold and hate hair in your face, you have come to the right place! I hope to see your version of this pattern on social media! Be sure to tag me on Instagram and TikTok, I am @crochetwithkathryn on both platforms!
I am extremely proud of this pattern because I had to overcome challenges I have not faced yet as a pattern designer! I know I probably did not invent the stitch I used, but I did lots to testing to make the stitch have the perfect look for this headband. Because most of the other patterns did not involve sizing at all, I had to quickly come up with a method I could rely on for sizing.
– hdc2tog = half double crochet 2 stitches together
Now that we have everything, let’s get started!
Sizing
With your 5mm hook –
In the main yarn color for the headband –
Ch 11
Row 1: In the 2nd ch from the hook, sc and sc down the row, ch 1 and turn (10)
Rows 2-9: sc across, ch 1 and turn (10)
Row 10: sc across and fasten off (10)
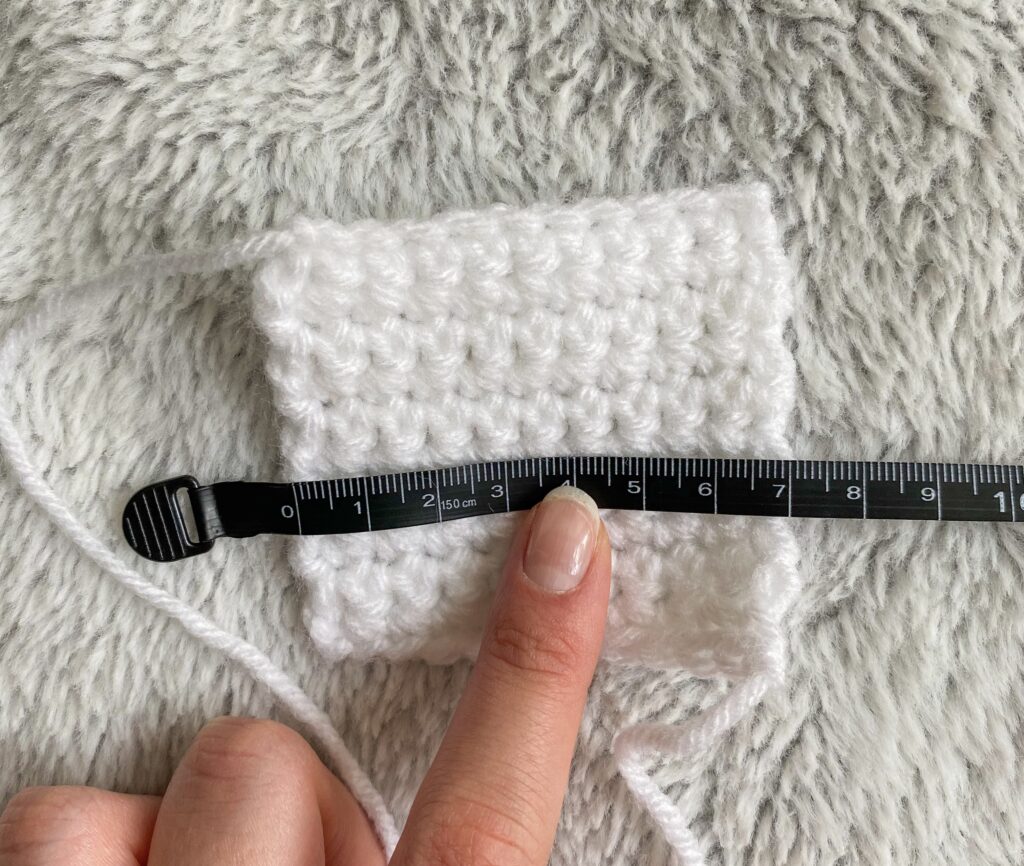
– You should be left with a 10×10 square of sc
– This is the gauge of your personal tension to correctly size headband to your head*
With the measuring tape –
Measure the horizontal length of the gauge swatch in cm
Round your measurement to the nearest half cm
For me, the 10 stitches measured horizontally is 7cm
Measuring your head
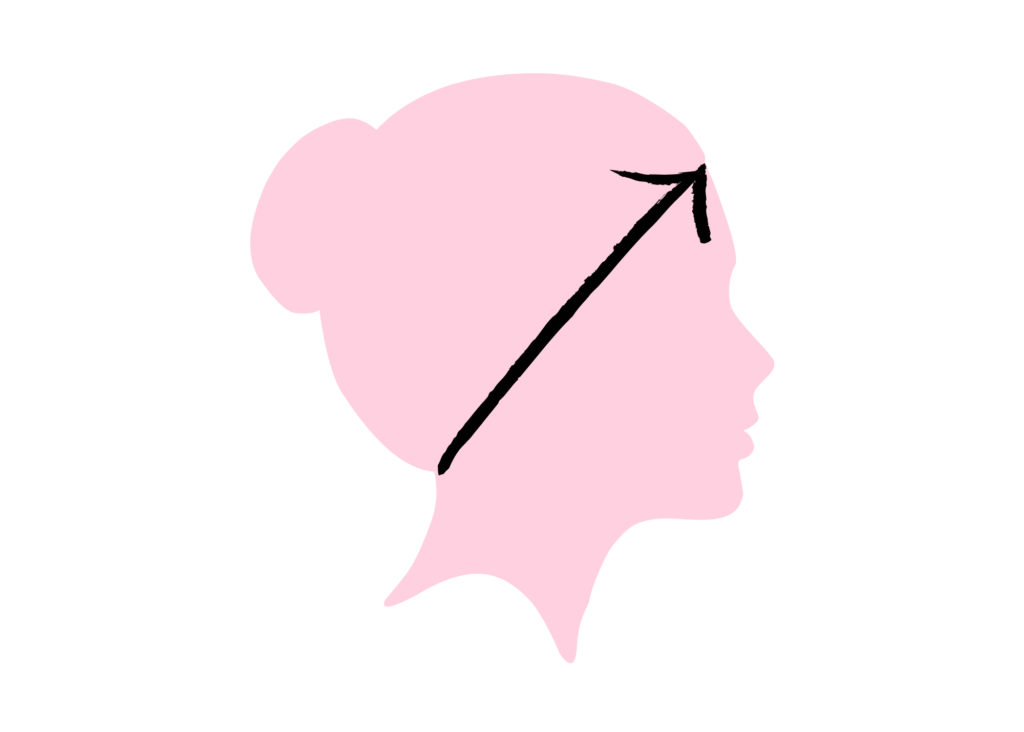
Measure around your head where you want the headband to sit
For me, this was from the base of my hairline at my neck, over my ears and around my forehead right at the hairline
Round your measurement to the nearest half cm
The measurement of my head is 56cm
Please see diagram to see where I measured my head. If you choose to have the headband sit in a different way, feel free to measure differently than me!
Now, let’s figure out how many stitches you need for the headband with a little math
The equation you will use is
(10stitches/(measurement of the gauge swatch))x (measurement of head in cm) = number of stitches you need for your headband to fit
My equation:
(10 st/ 7cm)x 56cm = 80 st
NOTE: your stitch count needs to be a multiple of 3. The closest multiple of 3 to my st count is 81
Take your stitch count and subtract 6 sts because the yarn will stretch so if you make exactly to your head, it will be loose
My st count = 81-6 = 75
Now that we have figured out the sizing, let’s make the headband!
Heart Headband
With your 5mm hook –
Ch the multiple of 3 st that you determined earlier
Row 1: In the 2nd ch from the hook, sc across, ch1 and turn (One less than your beginning st count)
Row 2: sc across, in the last stitch, change colors to heart color, ch 1 in the new color and turn (One less than your beginning st count)
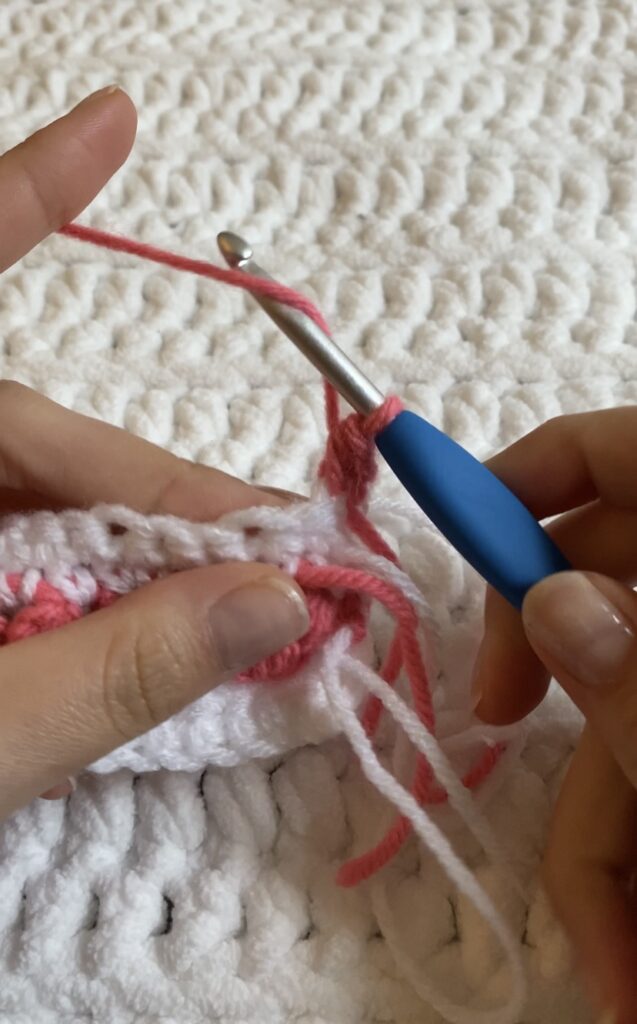
How to color change:
To color change, do not finish the last sc
Instead of yarning over with the headband color, yarn over with the heart color
Pull the color through the sc then continue to ch 1 and turn
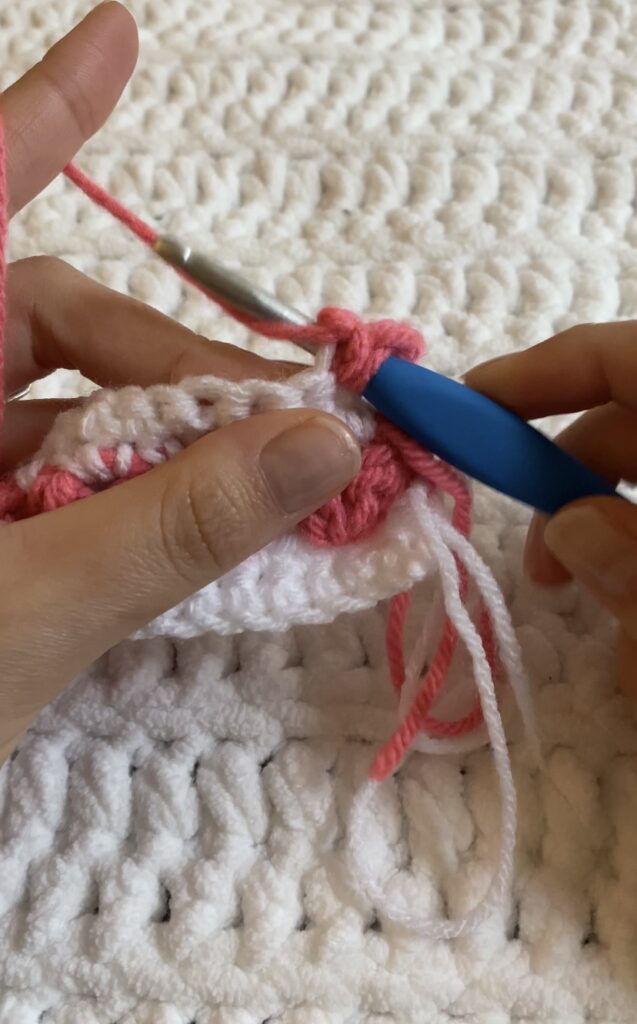
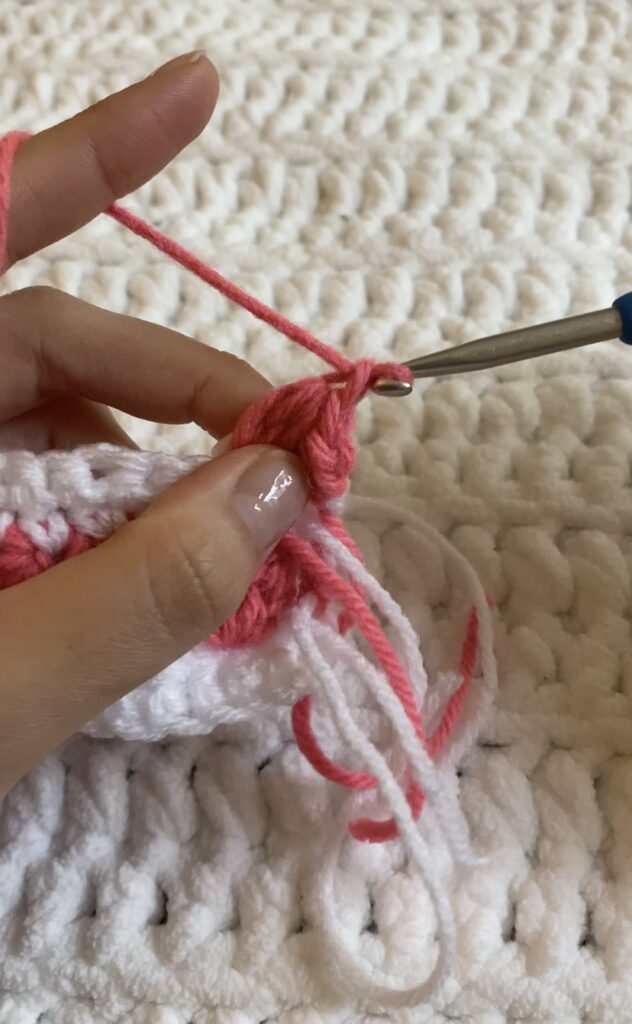
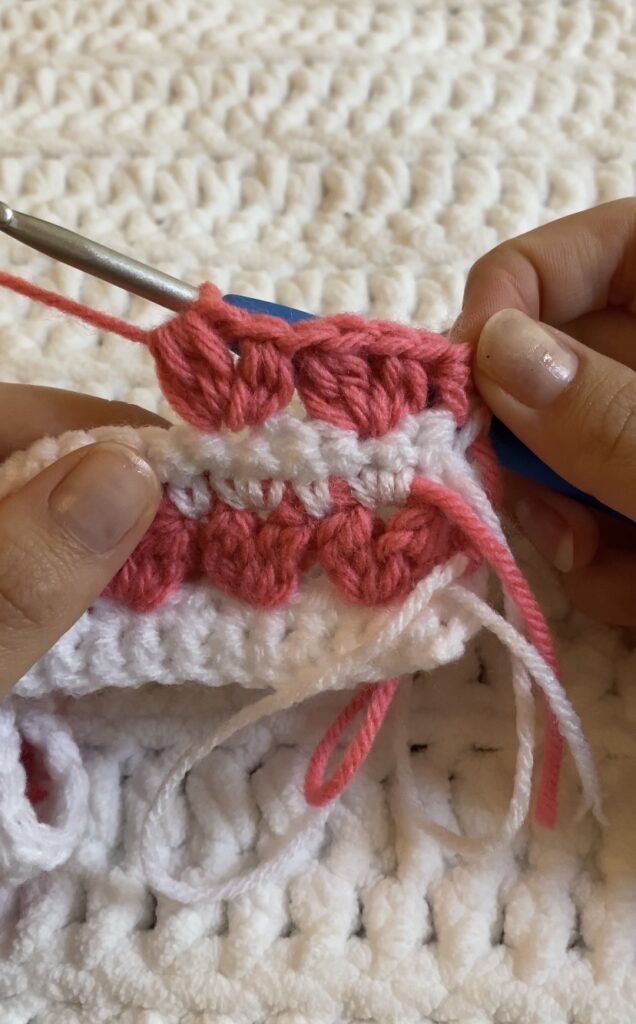
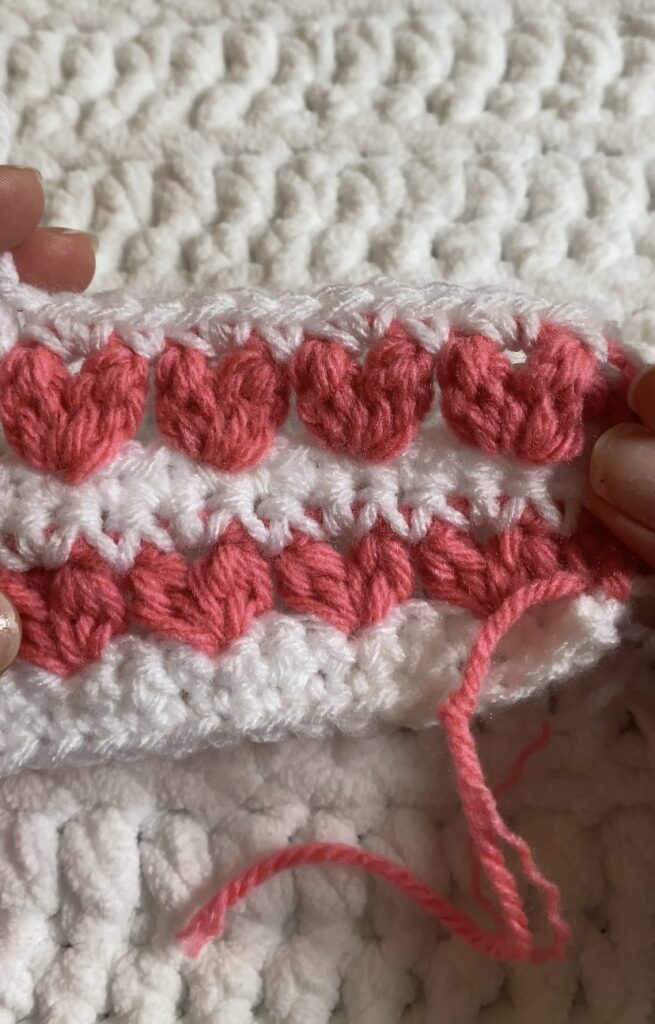
Row 3: hdc in the 1st stitch, skip a stitch. In the 3rd st hdc2tog, ch 1 and hdc2tog in the same st. Skip 2 sts. (Hdc2tog, ch1 and hdc2tog in the same st, skip 2 sts) Repeat the pattern in the parenthesis until there are only 2 stitches left after the last heart. Skip the 2nd the last st and hdc in the last st, change colors back to headband color, ch 1 and turn (One less than your beginning st count)
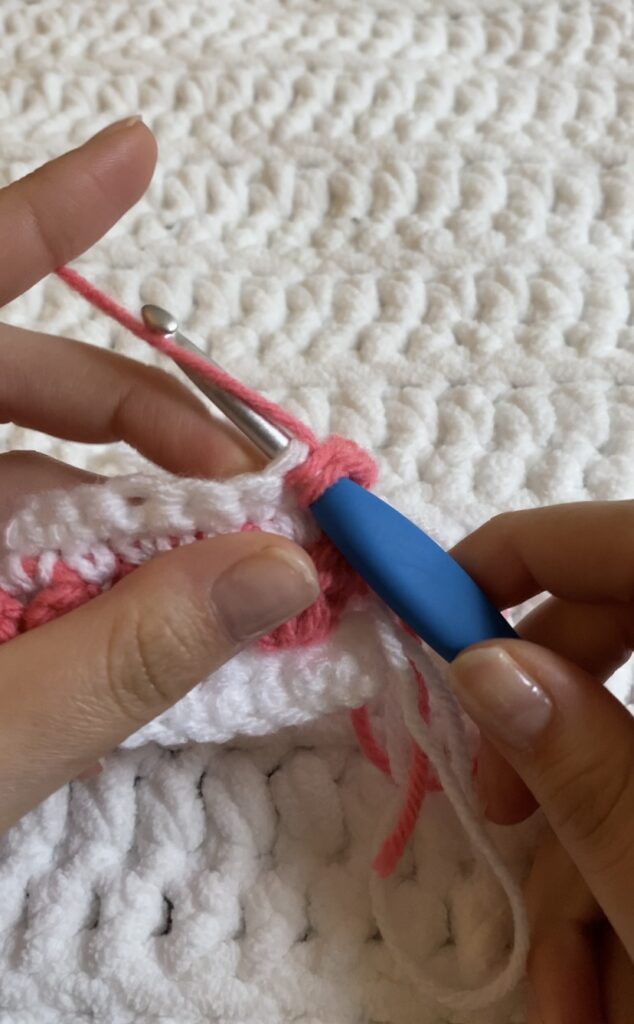
How to create the heart row on the headband:
Yarn over
Insert hook through the stitch and yarn over
Pull through there are 3 loops on the hook
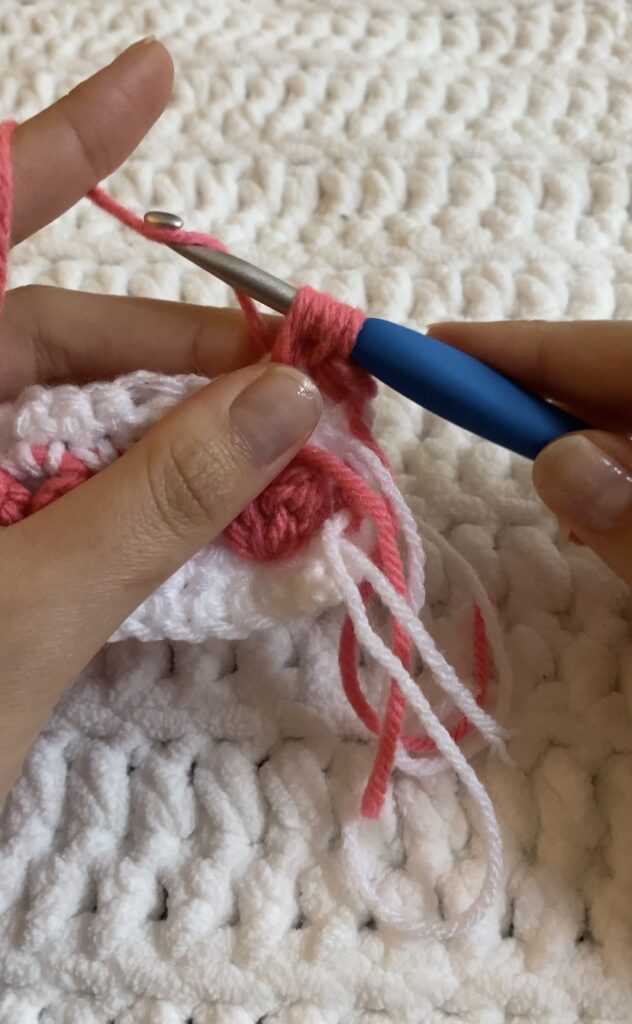
Yarn over
Pull through the 1st loop on the hook only
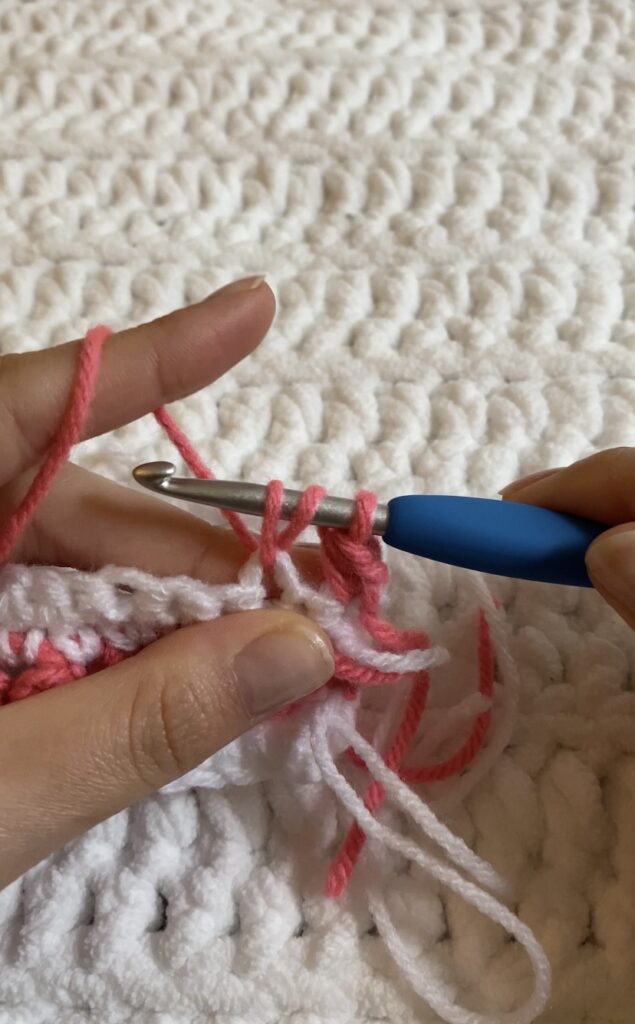
Yarn over
Insert your hook through the stitch
Yarn over
Yarn over and pull through the 1st loop on the hook only
Yarn over and pull though all loops on the hook
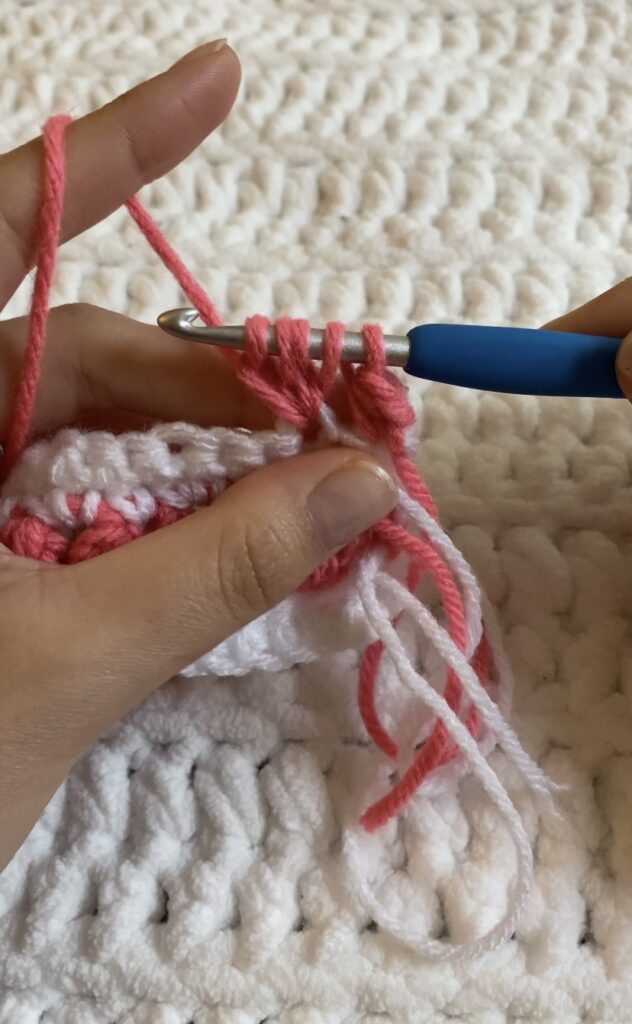
Chain 1 and repeat all steps in the same stitch to create the hearts
Continue down the row
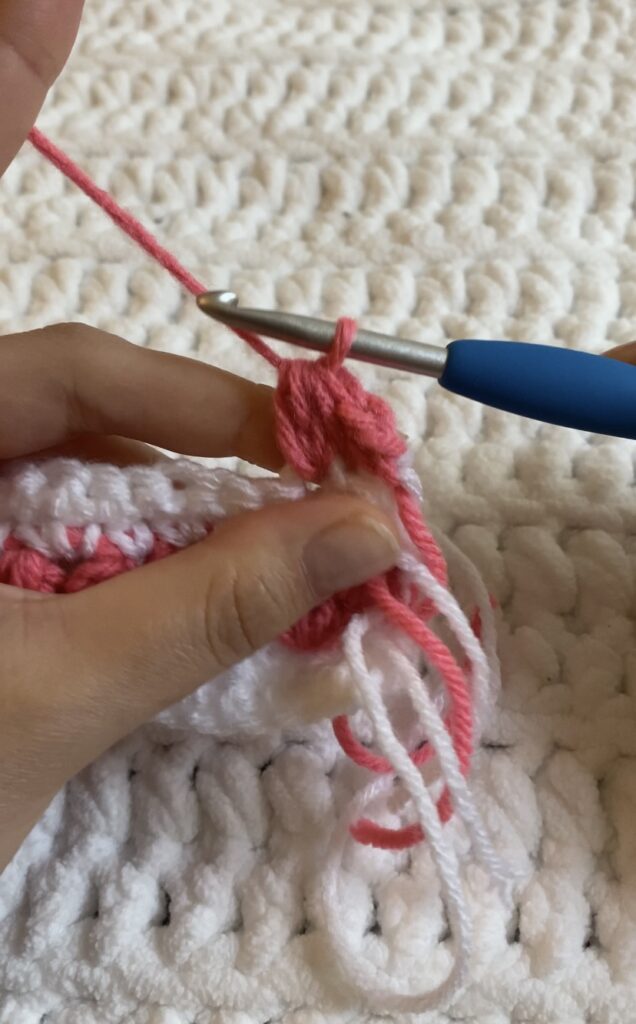
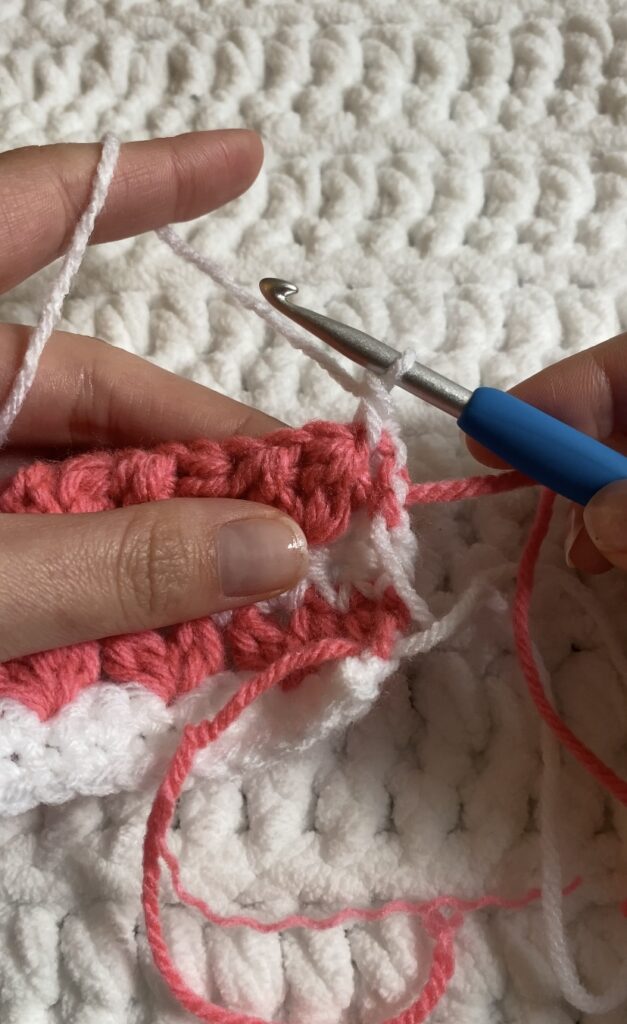
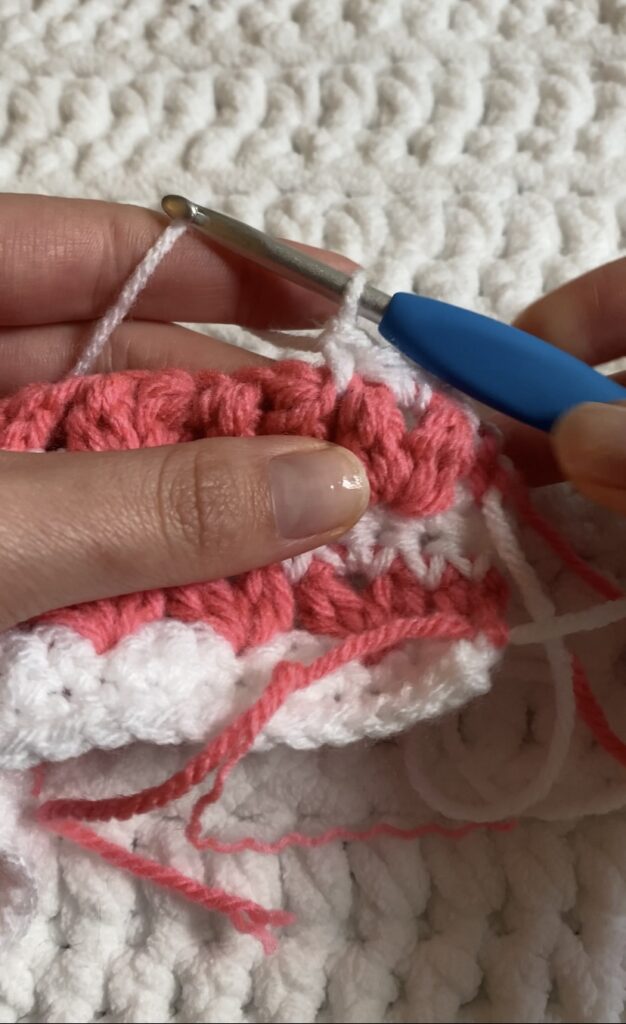
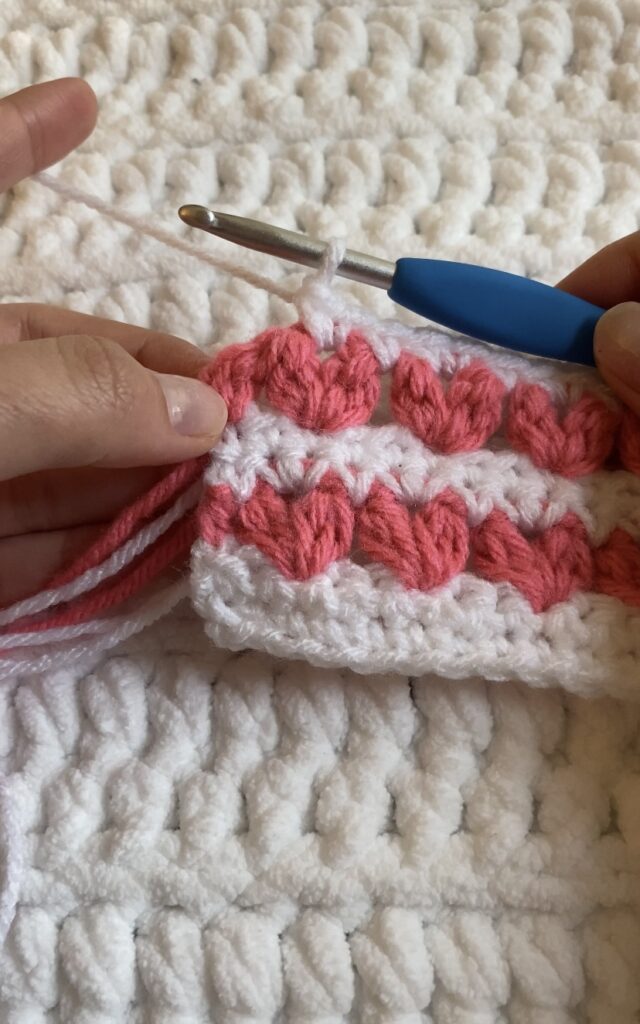
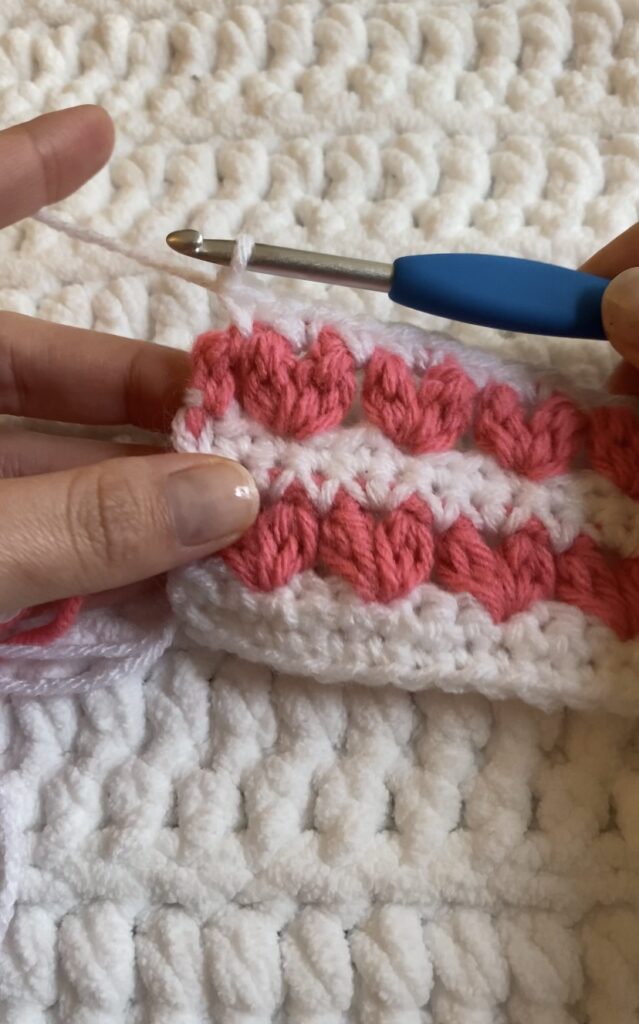
Row 4: In the space between the first hdc of the row and the 1st heart, place a sc. (In the ch sp in the middle of the heart, place 2 sc. Next in the space between hearts, place 1 sc) repeat the steps between the () until you reach the last heart.
We are left with a sc in between the 2nd to last and the last heart.
Place 2 sc in the middle of the heart, a sc in the space between the last heart and the last hdc, and a sc in the last st. Ch 1 and turn (Your custom ch amount)
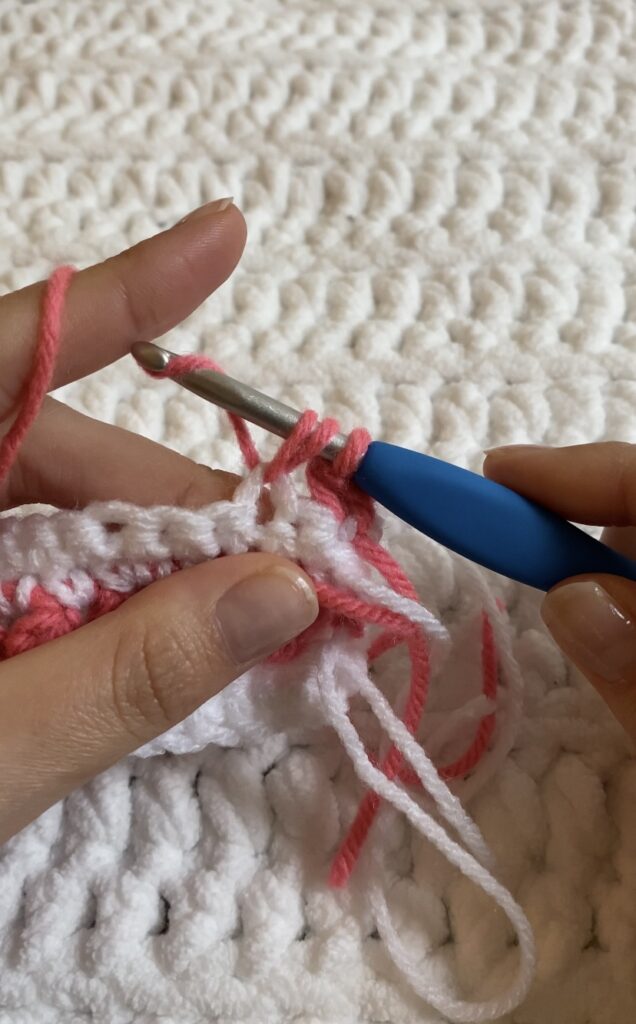
Where to sc in the 1st row after the heart row:
After the color change, ch 1 and turn
Place a sc in the space between the hdc and the 1st heart
Place 2 sc in the ch space in the middle of the heart
Place a sc in the space between the hearts
Repeat until the last heart
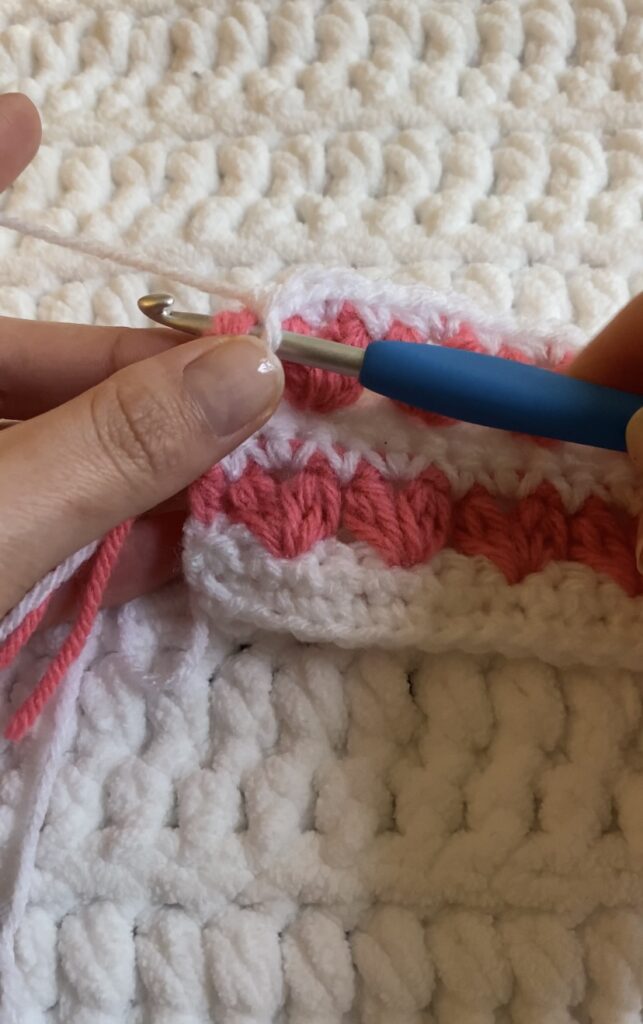
To finish the row, after your 2 sc in the chain space of the last heart
Place a sc in the space between the last heart and the hdc
Place another sc on the top of the hdc and you are finished with the row
Now, ch 1 and turn to start the other row
Row 5: sc across in the last st, change colors to the heart color, ch 1 and turn
Row 6: Repeat Row 3 –
hdc in the 1st stitch, skip a stitch. In the 3rd st hdc2tog, ch 1 and hdc2tog in the same st. Skip 2 sts. (Hdc2tog, ch1 and hdc2tog in the same st, skip 2 sts) Repeat the pattern in the parenthesis until there are only 2 stitches left after the last heart. Skip the 2nd the last st and hdc in the last st, change colors back to headband color, ch 1 and turn (One less than your beginning st count)
Row 7: Repeat Row 4 –
In the space between the first hdc of the row and the 1st heart, place a sc. (In the ch sp in the middle of the heart, place 2 sc. Next in the space between hearts, place 1 sc) repeat the steps between the () until you reach the last heart.
We are left with a sc in between the 2nd to last and the last heart.
Place 2 sc in the middle of the heart, a sc in the space between the last heart and the last hdc, and a sc in the last st. Ch 1 and turn (Your custom ch amount)
Row 8: Repeat Row 5 –
sc across in the last st, change colors to the heart color, ch 1 and turn (One less than your beginning st count)
Row 9: Repeat Row 3 –
hdc in the 1st stitch, skip a stitch. In the 3rd st hdc2tog, ch 1 and hdc2tog in the same st. Skip 2 sts. (Hdc2tog, ch1 and hdc2tog in the same st, skip 2 sts) Repeat the pattern in the parenthesis until there are only 2 stitches left after the last heart. Skip the 2nd the last st and hdc in the last st, change colors back to headband color, ch 1 and turn (One less than your beginning st count)
Row 10: Repeat Row 4-
In the space between the first hdc of the row and the 1st heart, place a sc. (In the ch sp in the middle of the heart, place 2 sc. Next in the space between hearts, place 1 sc) repeat the steps between the () until you reach the last heart.
We are left with a sc in between the 2nd to last and the last heart.
Place 2 sc in the middle of the heart, a sc in the space between the last heart and the last hdc, and a sc in the last st. Ch 1 and turn (Your custom ch amount)
Row 11: sc across and fasten off once you reach the end and leave a tail to sew your headband together (One less than your beginning st count)
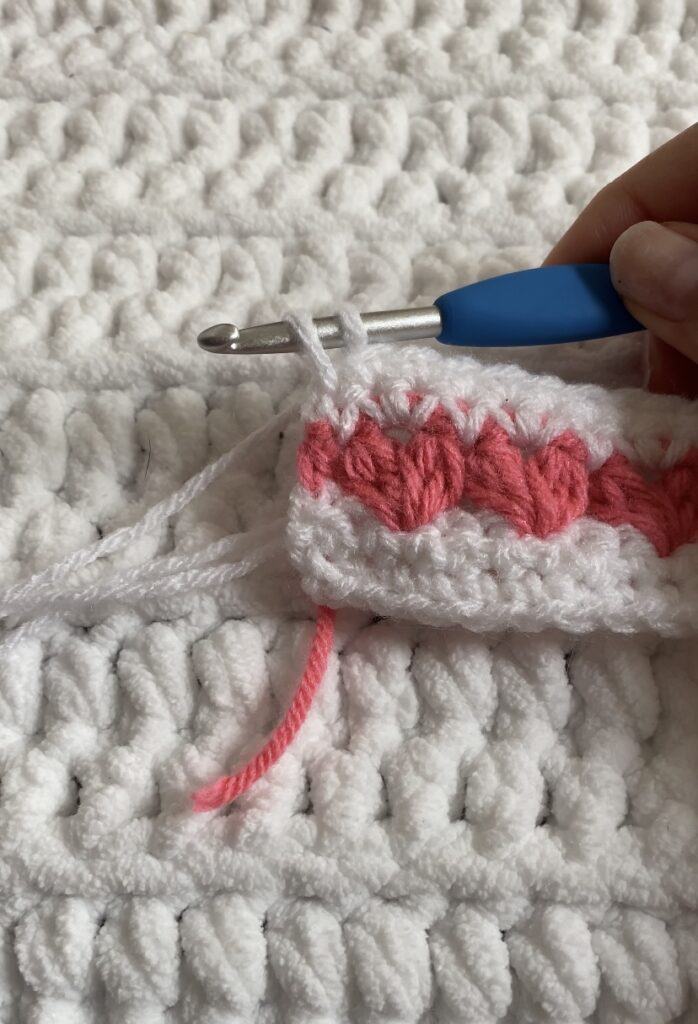
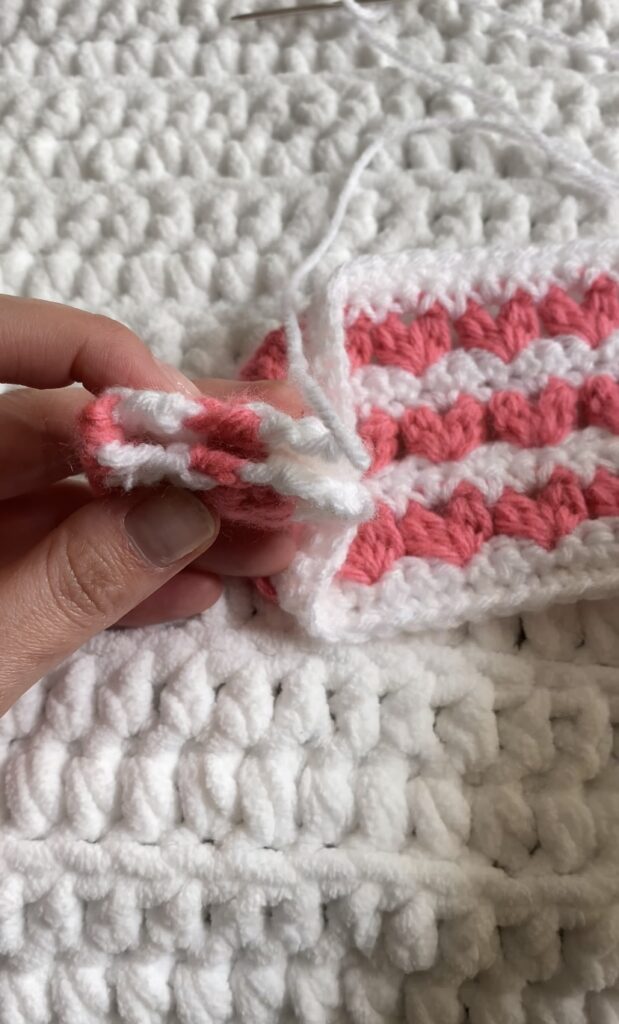
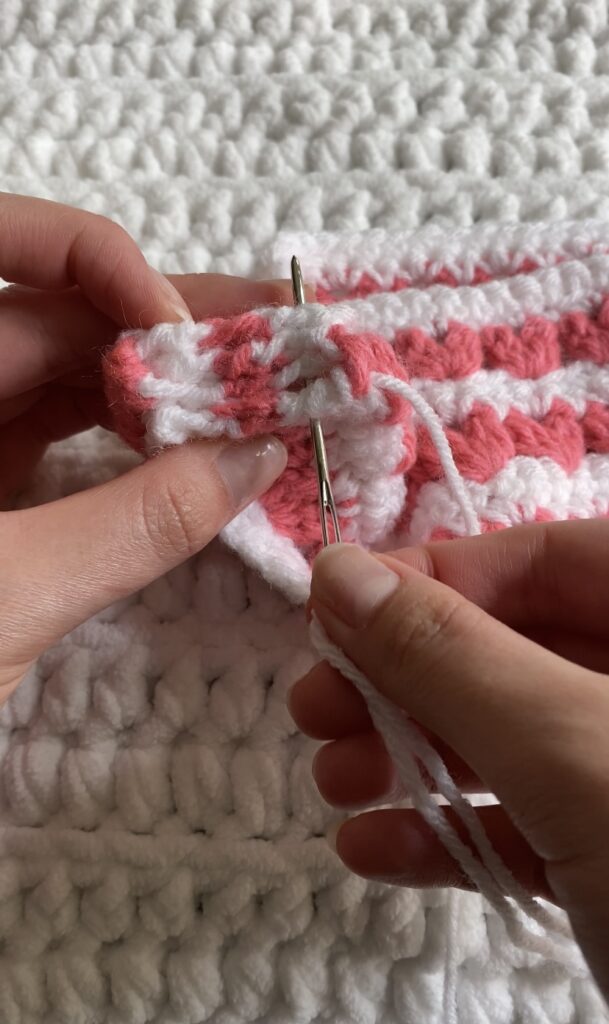
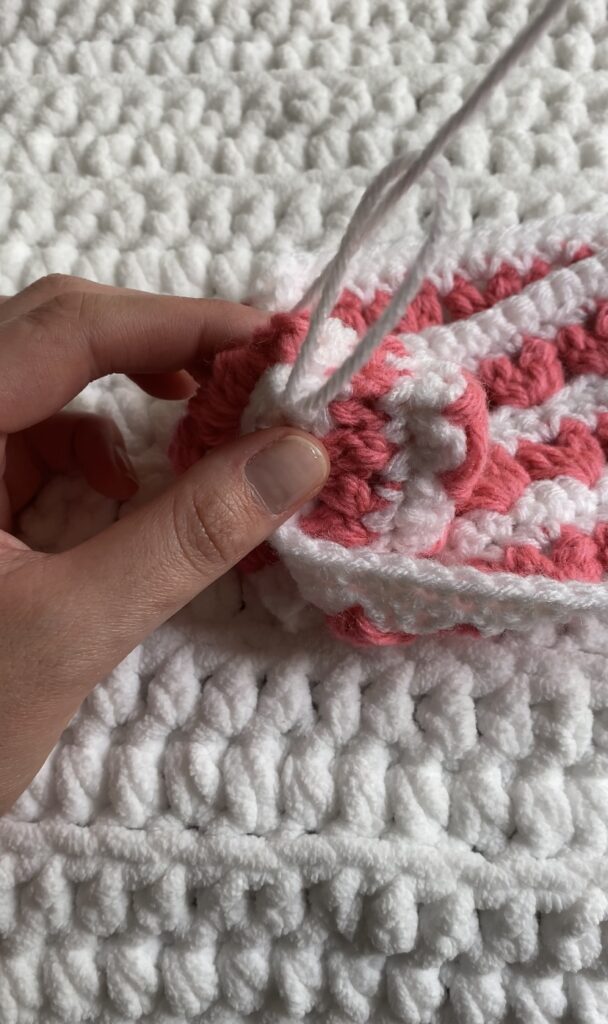
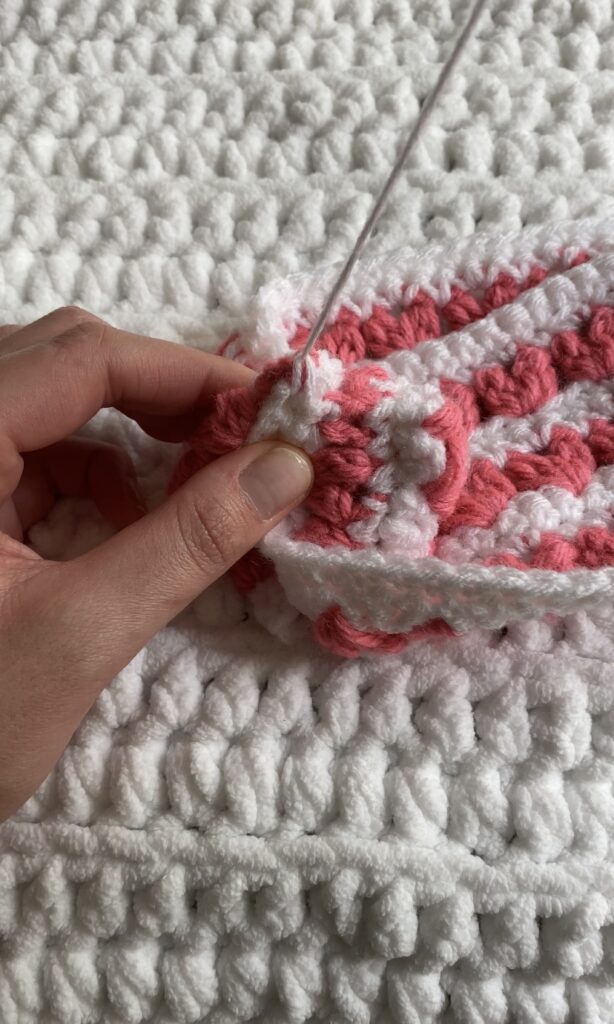
Sewing the Headband Together
To sew together, follow the images and explanation below
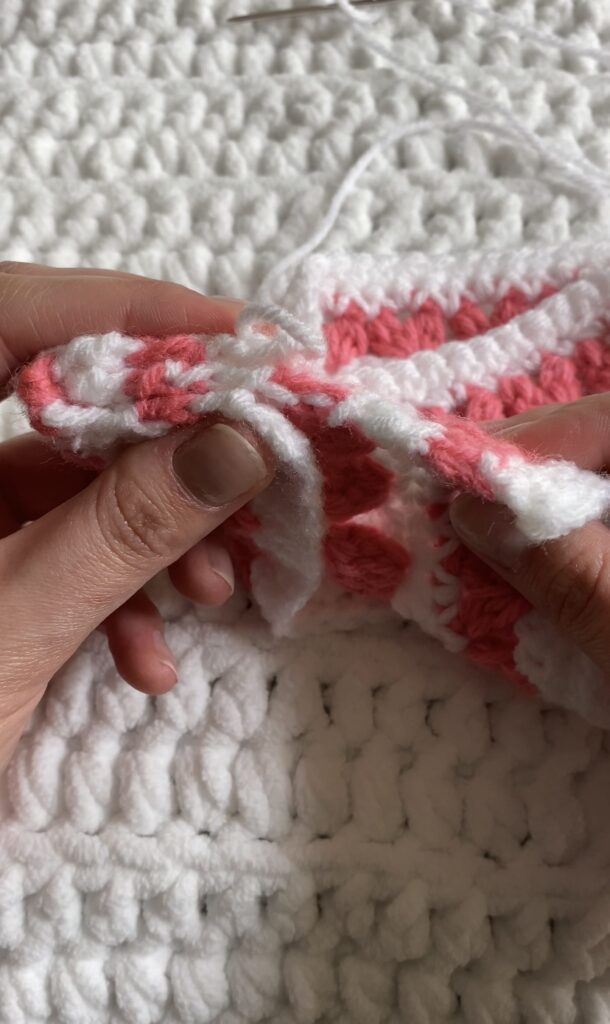
Fold one of the sides in half
Please the other end of the headband in between the fold in half
Fold the outstretched end under so the sides are sandwiched between each other
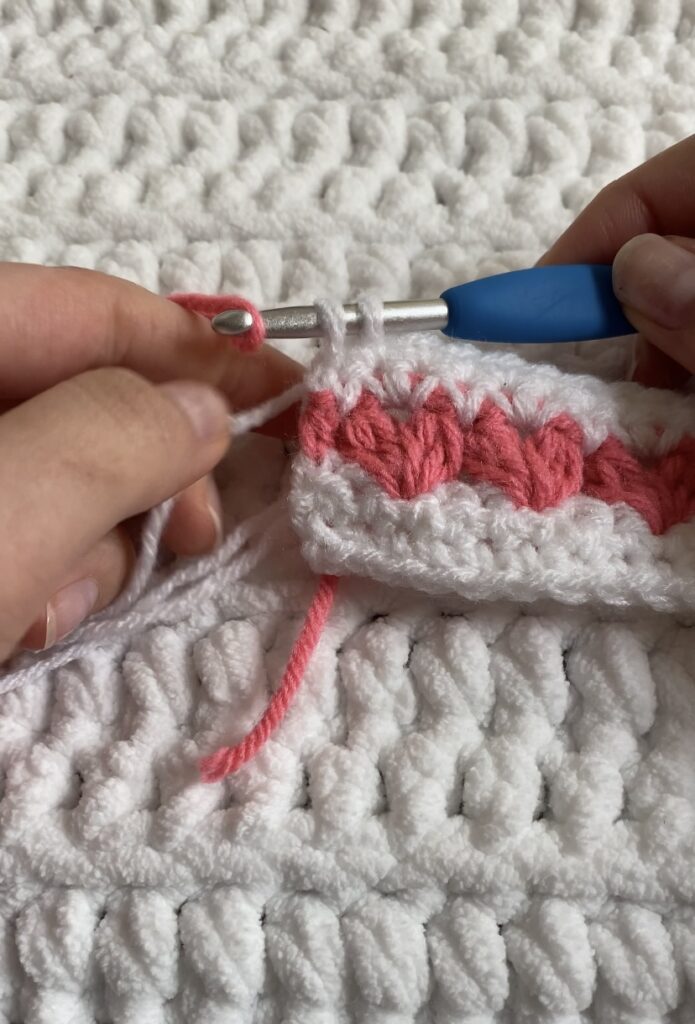
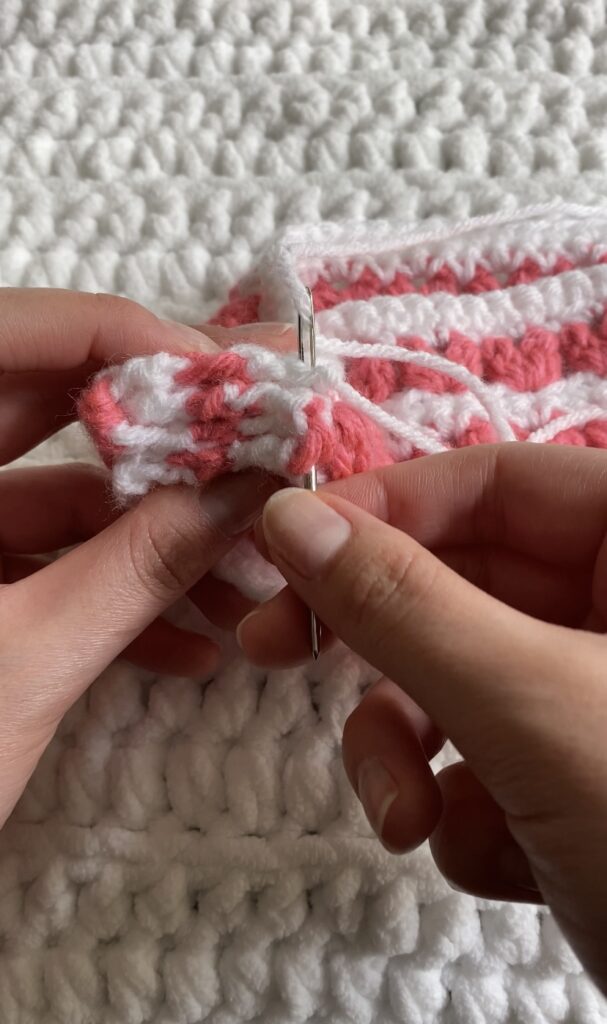
Use the tail to sew the folded ends together
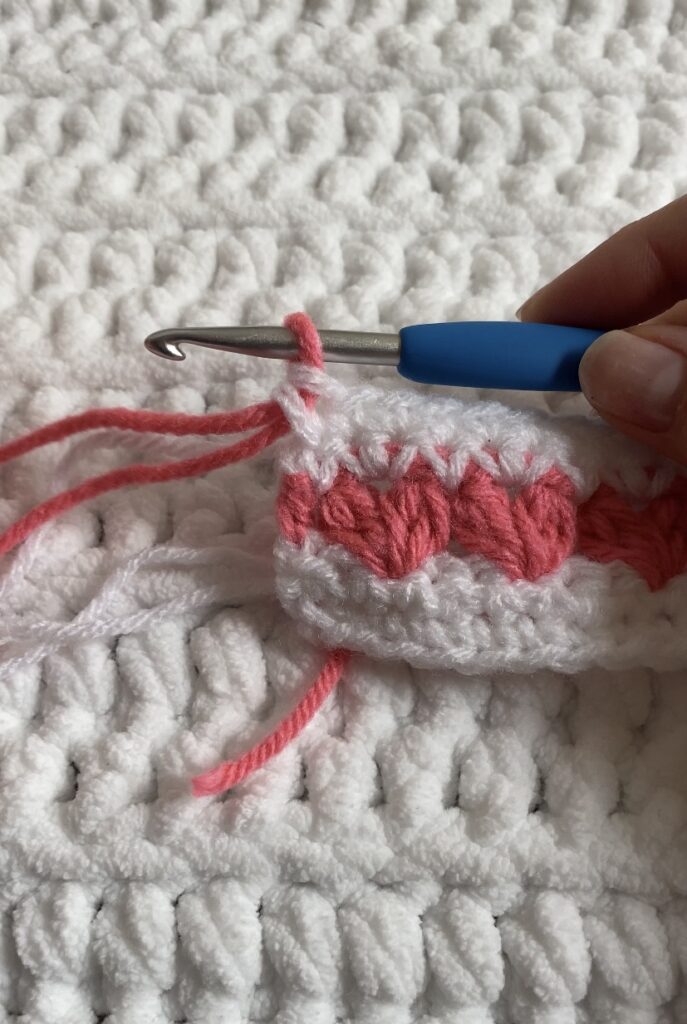
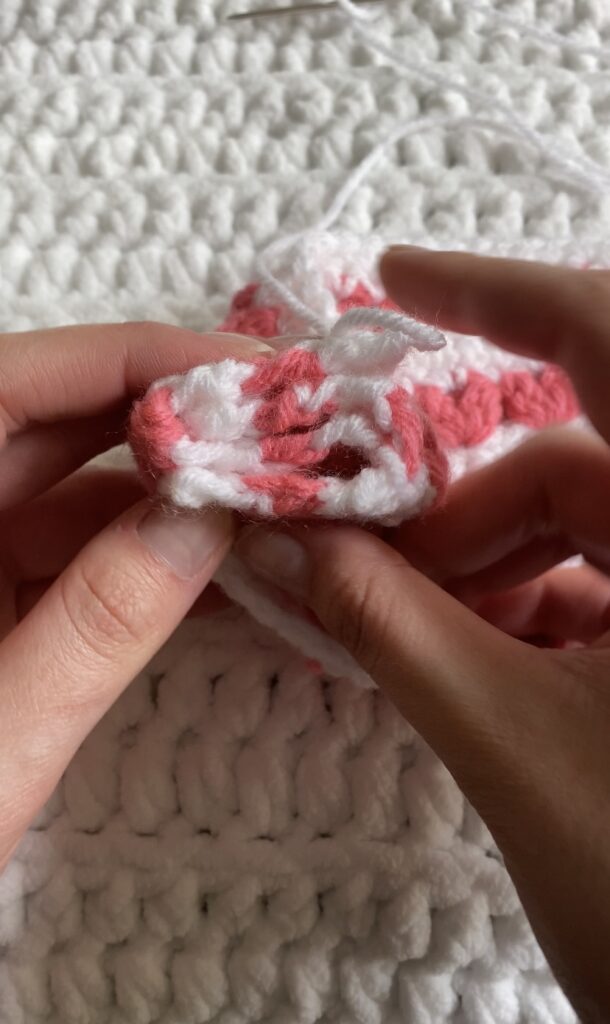
Continue to sew until the end
Do not finish the last stitch, leaving a loop behind
Thread your needle through the loop to make a knot
Pull tight and weave in the end
All Finished!
*Below is a version of the pattern written without abbreviations*
Sizing
With your 5mm hook –
In the main yarn color for the headband –
Chain 11
Row 1: In the 2nd chain from the hook, single crochet and single crochet down the row, chain 1 and turn (10)
Rows 2-9: single crochet across, chain 1 and turn (10)
Row 10: single crochet across and fasten off (10)
– You should be left with a 10×10 square of sc
– This is the gauge of your personal tension to correctly size headband to your head*
With the measuring tape –
Measure the horizontal length of the gauge swatch in cm
Round your measurement to the nearest half cm
For me, the 10 stitches measured horizontally is 7cm
Measuring your head
Measure around your head where you want the headband to sit
For me, this was from the base of my hairline at my neck, over my ears and around my forehead right at the hairline
Round your measurement to the nearest half cm
The measurement of my head is 56cm
Please see diagram to see where I measured my head. If you choose to have the headband sit in a different way, feel free to measure differently than me!
Now, let’s figure out how many stitches you need for the headband with a little math
The equation you will use is
(10stitches/(measurement of the gauge swatch))x (measurement of head in cm) = number of stitches you need for your headband to fit
My equation:
(10 st/ 7cm)x 56cm = 80 st
NOTE: your stitch count needs to be a multiple of 3. The closest multiple of 3 to my st count is 81
Take your stitch count and subtract 6 sts because the yarn will stretch so if you make exactly to your head, it will be loose
My st count = 81-6 = 75
Now that we have figured out the sizing, let’s make the headband!
Please refer to pictures above if needed
Heart Headband
With your 5mm hook –
Chain the multiple of 3 stitch that you determined earlier
Row 1: In the 2nd chain from the hook, single crochet across, chain 1 and turn (One less than your beginning stitch count)
Row 2: single crochet across, in the last stitch, change colors to heart color, chain 1 in the new color and turn (One less than your beginning stitch count)
Row 3: half double crochet in the 1st stitch, skip a stitch. In the 3rd st half double crochet 2 together, chain 1 and half double crochet 2 together in the same stitch. Skip 2 stitches. (Half double crochet 2 together, chain 1 and half double crochet 2 together in the same stitch, skip 2 stitches) Repeat the pattern in the parenthesis until there are only 2 stitches left after the last heart. Skip the 2nd the last stitch and half double crochet in the last stitch, change colors back to headband color, chain 1 and turn (One less than your beginning st count)
Row 4: In the space between the first half double crochet of the row and the 1st heart, place a single crochet. (In the chain space in the middle of the heart, place 2 single crochets. Next in the space between hearts, place 1 single crochet) repeat the steps between the () until you reach the last heart.
We are left with a single crochet in between the 2nd to last and the last heart.
Place 2 single crochets in the middle of the heart, a single crochet in the space between the last heart and the last half double crochet, and a single crochet in the last stitch. Chain 1 and turn (Your custom chain amount)
Row 5: single crochet across in the last stitch, change colors to the heart color, chain 1 and turn
Row 6: Repeat Row 3 –
half double crochet in the 1st stitch, skip a stitch. In the 3rd st half double crochet 2 together, chain 1 and half double crochet 2 together in the same stitch. Skip 2 stitches. (Half double crochet 2 together, chain 1 and half double crochet 2 together in the same stitch, skip 2 stitches) Repeat the pattern in the parenthesis until there are only 2 stitches left after the last heart. Skip the 2nd the last stitch and half double crochet in the last stitch, change colors back to headband color, chain 1 and turn (One less than your beginning st count)
Row 7: Repeat Row 4 –
In the space between the first half double crochet of the row and the 1st heart, place a single crochet. (In the chain space in the middle of the heart, place 2 single crochets. Next in the space between hearts, place 1 single crochet) repeat the steps between the () until you reach the last heart.
We are left with a single crochet in between the 2nd to last and the last heart.
Place 2 single crochets in the middle of the heart, a single crochet in the space between the last heart and the last half double crochet, and a single crochet in the last stitch. Chain 1 and turn (Your custom chain amount)
Row 8: Repeat Row 5 –
single crochet across in the last stitch, change colors to the heart color, chain 1 and turn
Row 9: Repeat Row 3 –
half double crochet in the 1st stitch, skip a stitch. In the 3rd st half double crochet 2 together, chain 1 and half double crochet 2 together in the same stitch. Skip 2 stitches. (Half double crochet 2 together, chain 1 and half double crochet 2 together in the same stitch, skip 2 stitches) Repeat the pattern in the parenthesis until there are only 2 stitches left after the last heart. Skip the 2nd the last stitch and half double crochet in the last stitch, change colors back to headband color, chain 1 and turn (One less than your beginning st count)
Row 10: Repeat Row 4-
In the space between the first half double crochet of the row and the 1st heart, place a single crochet. (In the chain space in the middle of the heart, place 2 single crochets. Next in the space between hearts, place 1 single crochet) repeat the steps between the () until you reach the last heart.
We are left with a single crochet in between the 2nd to last and the last heart.
Place 2 single crochets in the middle of the heart, a single crochet in the space between the last heart and the last half double crochet, and a single crochet in the last stitch. Chain 1 and turn (Your custom chain amount)
Row 11: single crochet across and fasten off once you reach the end and leave a tail to sew your headband together (One less than your beginning stitch count)
Sewing the Headband Together
To sew together, follow the images and explanation above.
All Finished!
Disclaimer:
Some of these links are affiliate links and I will receive a commission for any purchase you choose to make through these links at no additional cost to you.
As an Amazon Associate I earn from qualifying purchases.
You are free to sell any completed items made from this pattern so long as I am credited for the pattern in the description of the item, and on social media posts. The completed items may be sold, but not mass produced.
You may not sell my patterns or claim them as your own.