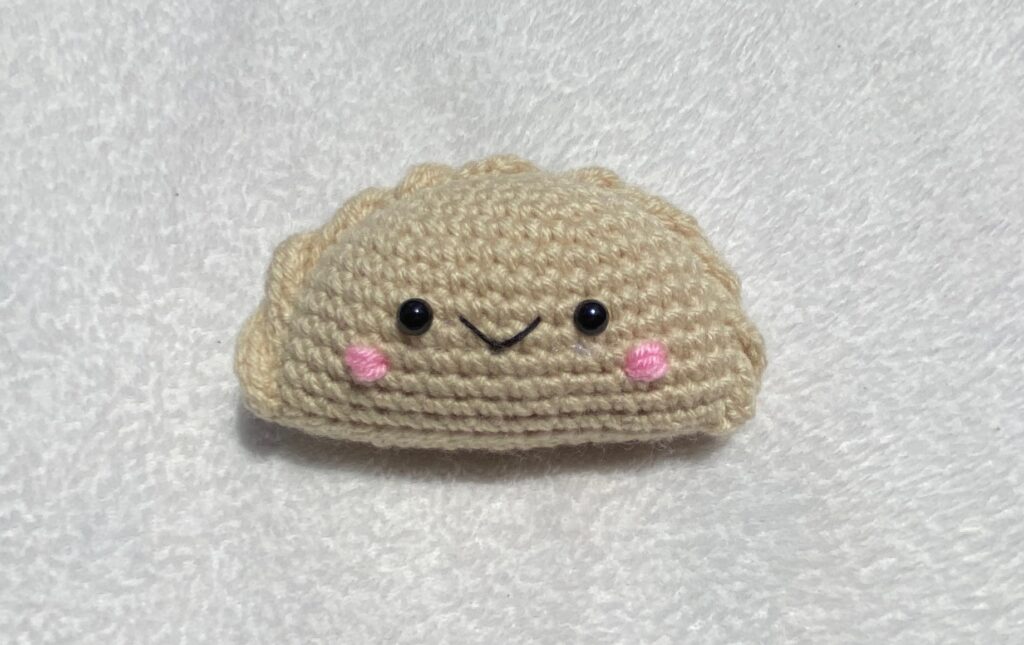
Empanada Amigurumi Pattern
This pattern is perfect for complete beginners! It’s quick, easy and adorable! If you make one, I would love to see it! Tag me on Instagram or Tik Tok with your completed plushie! You can find me @crochetwithkathryn on both platforms

Patterns Notes:
Pattern is written in USA terms
Use the locking stitch marker in the first stitch of every round so that you can always keep track of your stitch count
Materials used:
Yarn: Tan Big Twist Value Yarn, weight 4, medium (Aran or worsted weight) about 15 grams
Hook: 4mm or G
A strand of pink yarn for sewing details
Black Embroidery Floss
Sewing pins
Fiber fill
Tapestry Needle
Safety Eyes
Locking Stitch Markers
Abbreviations:
MR – magic ring
Sc – single crochet
St – stitch
Sl st – slip stitch
Inc – 2 single crochets in the same stitch
Now that we have covered everything, let’s get started!
Main Piece of the Empanada
Rnd 1: MR with 6 sc (6)
Rnd 2: 2 sc in each st (12)
Rnd 3: 1 sc, 1 inc, repeat 6 times (18)
Rnd 4: 2 sc, 1 inc, repeat 6 times (24)
Rnd 5: 3 sc, 1 inc, repeat 6 times (30)
Rnd 6: 4 sc, 1 inc, repeat 6 times (36)
Rnd 7: 5 sc, 1 inc, repeat 6 times (42)
Rnd 8-15: sc around (42)
*Fasten off and leave a long tail for sewing
Sewing the Main Piece of the Empanada
1. Flatten the empanada, line up the stitches on both sides of the circle-like form and begin to sew together
2. Once about half way through sewing, add safety eyes and begin to stuff with fiberfill
3. Finish sewing, fasten off the end and weave end into the piece to avoid unraveling
Crimped Edges of the Empanada x2
Chain 45
Sl st to the end of the chain, for a total of 44 slip stitches
Fasten off the cord, leave a long string for sewing
Placement and sewing instructions for Crimped Edges of the Empanada
1. Using the sewing pins, pin the ends of the cords side by side at the end of the main piece of the empanada
2. Twist the cords together, making sure that the twists are evenly spaced
3. Pin the cords in place to the main piece of the empanada with the sewing pins
4. Once satisfied with the placement of the crimped edges of the empanada, sew to the main piece of the work
5. Use the pink yarn to sew blush on the empanada by sewing over the same stitches to create volume
And now, you’re finished!!!
*Below is a more detailed version of the pattern that does not have abbreviations
Main Piece of the Empanada
Round 1: Create a magic ring with 6 single crochets (6)
Round 2: Place 2 single crochets in each stitch (12)
Round 3: 1 single crochet, followed by 1 increase, repeat 6 times (18)
Round 4: 2 single crochet, followed by 1 increase, repeat 6 times (24)
Round 5: 3 single crochet, followed by 1 increase, repeat 6 times (30)
Round 6: 4 single crochet, followed by 1 increase, repeat 6 times (36)
Round 7: 5 single crochet, followed by 1 increase, repeat 6 times (42)
Round 8-15: single crochet around (42)
Sewing the Main Piece of the Empanada
1. Flatten the empanada, line up the stitches on both sides of the circle-like form and begin to sew together
2. Once about half way through sewing, add safety eyes and begin to stuff with fiberfill
3. Finish sewing, fasten off the end and weave end into the piece to avoid unraveling
Crimped Edges of the Empanada x2
Chain 45
Slip stitch in the 2nd chain from the hook
Slip stitch to the end of the chain for a total of 44 slip stitches
Fasten off the cord, leave a long string for sewing
Placement and sewing instructions for Crimped Edges of the Empanada
1. Using the sewing pins, pin the ends of the cords side by side at the end of the main piece of the empanada
2. Twist the cords together, making sure that the twists are evenly spaced
3. Pin the cords in place to the main piece of the empanada with the sewing pins
4. Once satisfied with the placement of the crimped edges of the empanada, sew to the main piece of the work
5. Use the pink yarn to sew blush on the empanada by sewing over the same stitches to create volume
If you find any errors with this pattern, please let me know! I will be more than happy to adjust to bring more clarification
You are free to sell any completed plushies made from this pattern so long as I am credited for the pattern in the description of the item, and on social media posts. The completed items may be sold, but not mass produced.
You may not sell my patterns or claim them as your own.
Happy Crocheting!
